
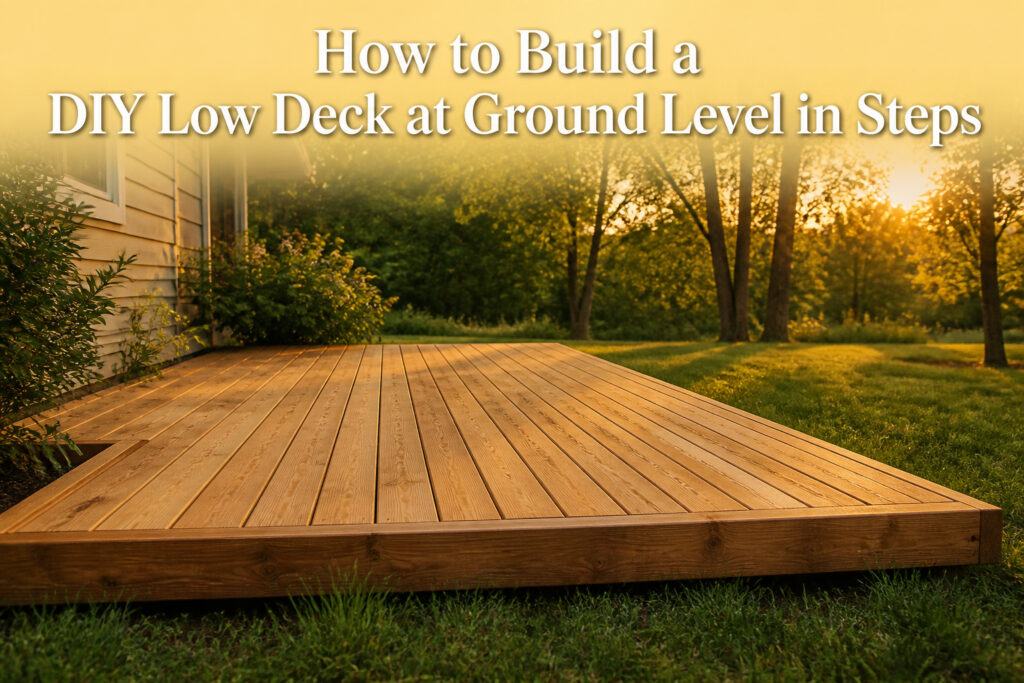

A basic floating deck runs about five hundred dollars in pressure-treated lumber and screws, and most people can set one up over a single weekend if the ground is flat.
The footing choice changes that timeline completely: some jurisdictions accept concrete deck blocks for low profiles, while others mandate frost-depth footings regardless of height, and the only way to know which rule applies to your yard is to call your building department before you dig.
That phone call takes five minutes and saves a teardown.
1. Install the Base
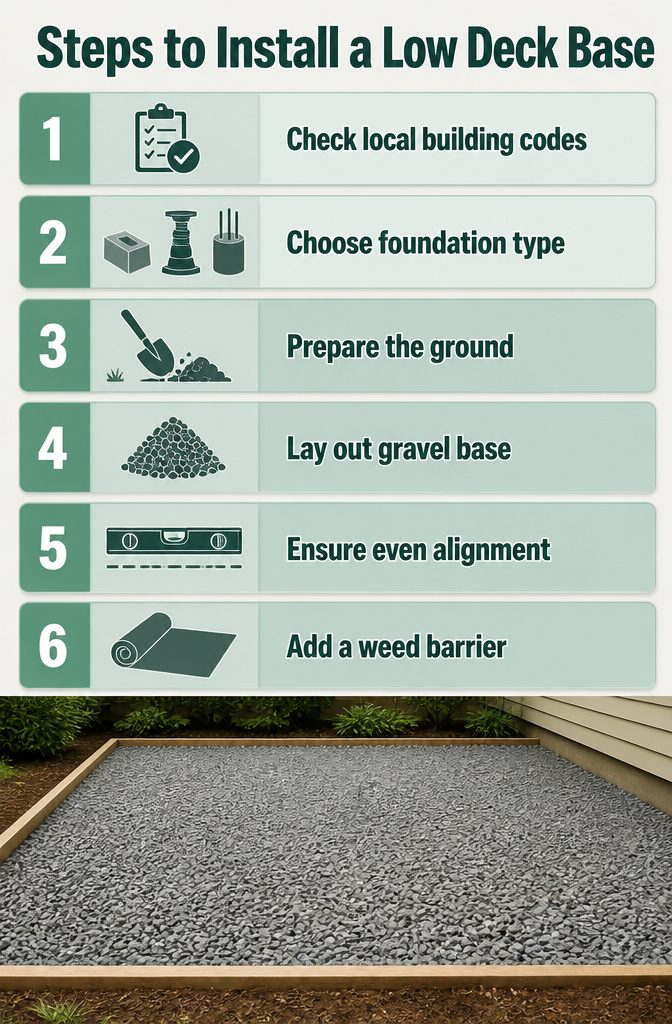
A ground-level deck still needs a stable, well-supported foundation. The right support system depends on your soil conditions, deck size, and local code requirements.
Even a low deck may require frost-depth footings or approved deck blocks, depending on where you live. A quick call to your local building department settles this before you dig.
Three common foundation options work here:
- Concrete deck blocks run the cheapest, but every single block must sit at the exact right height. String lines and a level are non-negotiable.
- Adjustable deck pedestals can be placed directly on the ground and dialed to height afterward. They also eliminate the need for beams if you run them under each joist.
- Poured concrete frost footings, set below your local frost depth, give the most stability and the longest lifespan. Poured surface footings work too, and they also let you skip beams.
Before setting any support, strip away organic material and lay a compacted gravel base. That layer stops settling that throws off every measurement you just agonized over.
Even a low deck may require frost-depth footings or approved deck blocks, depending on local building codes. Always check with your local building department.
That check costs a phone call and saves a teardown. Once your supports are aligned and level, add a weed barrier before the framing starts.

Premium Material: Our adjustable deck block base is made of high-quality polypropylene material, which is durable and eco-friendliness. Featuring a ventilation design to avoid water buildup, it is resilient against both low and high temperatures without damaging the main structure, and the material has excellent performance in resisting corrosion, oxidation, and UV radiation, suitable for long-term use.

【Premium Materials 】Made from high-quality UV-resistant polypropylene, our adjustable deck support base is designed for remarkable durability and strength for long-term use. It retains its structural stability under most conditions, featuring a ventilation system to prevent water accumulation. This unique, lightweight yet sturdy material addresses the installation difficulties associated with the heavy weight of traditional concrete bases.
2. Crown the Lumber
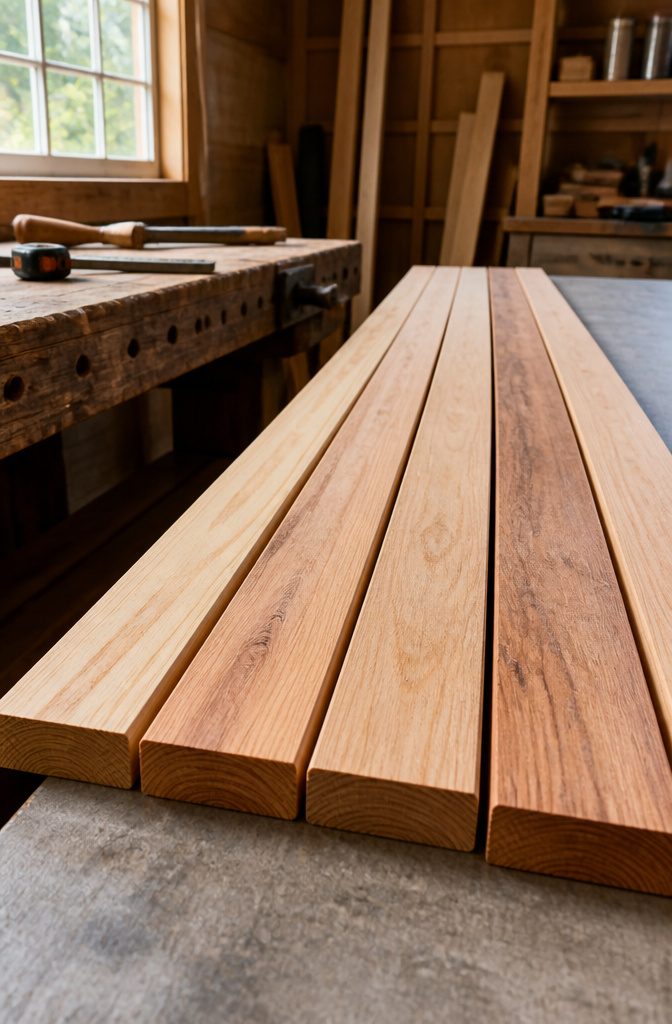
Dimensional lumber never arrives perfectly straight. Install every joist and beam with the crown facing up, and the frame stays flatter for years.
The crown is the slight outward bow most boards carry along their edge, a convex curve from the tree’s growth that survives the mill.
Finding it takes about two seconds: sight down the narrow edge of the board like you’re looking down a rifle barrel, and the bow reveals itself.
Mark the high side with a quick pencil line or a piece of chalk so you remember which way faces the sky.
Gravity works with you this way, not against you. Weight pressing down on an upward crown tends to settle the board straighter over time, while a crown facing down gives gravity something to pull on and sag.
Line them all up the same direction, too, or the decking above will telegraph every wavy joist into a wavy walking surface you notice every single morning.

Professional Grade Weed Barrier: LAVEVE weed barrier fabric is made of woven polypropylene material. Its high-density and permeable characteristics effectively stop weed growth and protect soil health so your plants can grow well.

【100% Shading, Inhibiting Weed Growth】The heavy duty weed barrier fabric features excellent light-blocking properties, which can effectively block the growth of weeds and achieve long-term weed control. No more constant bending, hand-pulling, or using harsh herbicides - this barrier blocks weeds at the source, saving you time, effort, and maintenance costs.

[Water and Air Permeable Design] Porous PE cloth allows rainwater and liquid fertilizer to pass directly into soil below. Your plant roots receive oxygen and when using this ground cover under mulch or decorative stones.
3. Set the Beams
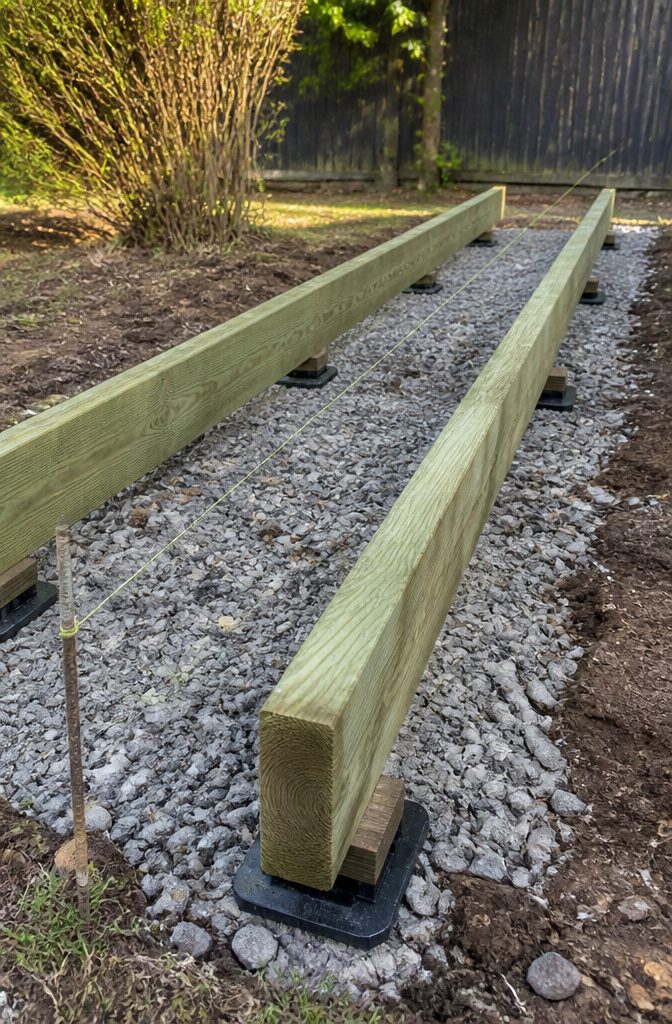
- Roll the beam into place over the footing and check it for level along the full length. Small corrections call for composite shims rated for structural loads; skip the wood ones, since compression and rot will undo your work later.
- Six inches of clearance between the ground and the bottom of your beams keeps air moving and lets water escape rather than pool. Below that, damp cycles will sit against the lumber and start deterioration you will not see until it is expensive.
- Run a string line tight along the top edge to confirm the beam is straight, not just level. Any bow reads as a wave in the deck boards you lay on top of it.
- Fasten the beam to the post or pier with an approved structural connector, driven to the manufacturer spec and whatever your local code demands. Hurricane ties and structural screws are the common pairing here. Do not eyeball this; an inspector will not, and the failure mode is collapse.

【Stable Deck Support】 Made of UV-resistant polypropylene for long-term outdoor durability Ideal for patios, rooftops, and low-level decks. Provides stable, evenly distributed support for joists and framing systems.holds up to 1000 lbs — not for 4x4 posts.

【Stable Deck Support】 Made of UV-resistant polypropylene for long-term outdoor durability Ideal for patios, rooftops, and low-level decks. Provides stable, evenly distributed support for joists and framing systems.holds up to 1000 lbs — not for 4x4 posts.

【Durable Material】: Our adjustable deck support pedestal is made of high quality anti-uv polypropylene material, which is sturdy and durable for long-term use.It has high corrosion resistance, making the combination of durability and lightweight characteristic perfectly, solving the problem of too heavy to setting traditional concrete deck base, unique material improve your Installation experience.
4. Build the Frame
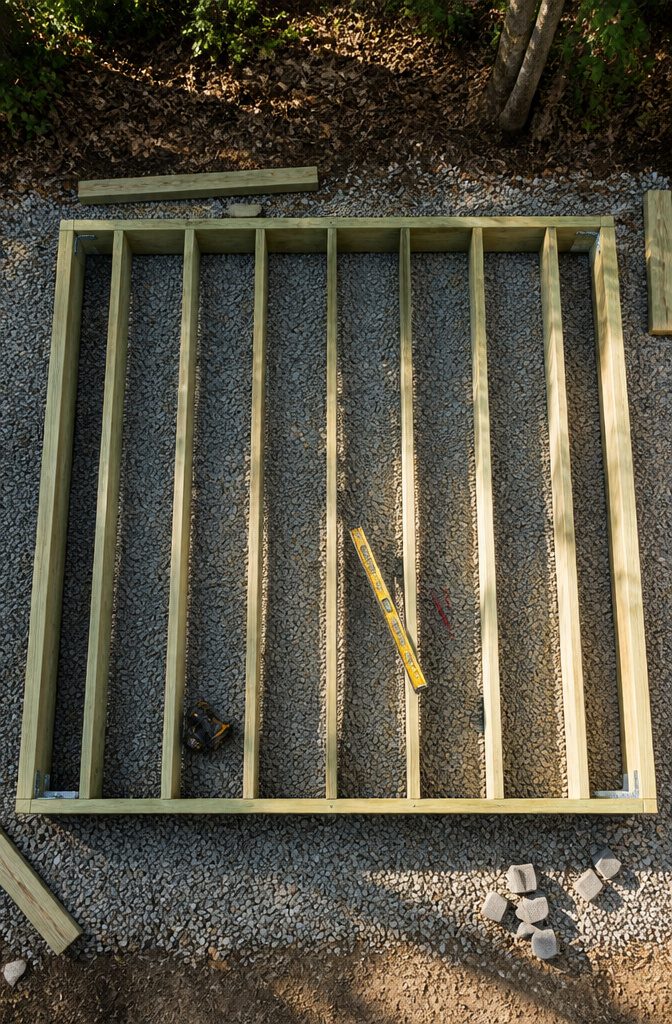
- Lay out the perimeter frame with pressure-treated beams on your base, working from one corner and checking each joint as you go. A floating deck like the 10′ x 12′ size my neighbor built in a June weekend is small enough to stay manageable but still needs the frame dead square before anything else moves.
- Space joists 12 to 16 inches on center, matching your decking manufacturer’s span requirements. Composite boards usually want the tighter spacing; solid wood can run the wider one. Measure from the center of each joist, not the edge.
- Fasten rim joists and end joists with structural screws rated for treated lumber, or use code-approved joist hangers if your local inspector prefers them. I have seen both pass, but one county I called would not budge on hangers.
- Check the frame for square by measuring diagonally corner to corner. The two measurements must match exactly; adjust now, not after the joists go in.
- Run a string line along the perimeter joists to confirm they are straight, then install interior joists. Blocking between them stiffens the walking surface and kills the springy feel cheap decks get.
【100% Shading, Inhibiting Weed Growth】The heavy duty weed barrier fabric features excellent light-blocking properties, which can effectively block the growth of weeds and achieve long-term weed control. No more constant bending, hand-pulling, or using harsh herbicides - this barrier blocks weeds at the source, saving you time, effort, and maintenance costs.
【100% Shading, Inhibiting Weed Growth】The heavy duty weed barrier fabric features excellent light-blocking properties, which can effectively block the growth of weeds and achieve long-term weed control. No more constant bending, hand-pulling, or using harsh herbicides - this barrier blocks weeds at the source, saving you time, effort, and maintenance costs.
5. Protect the Frame
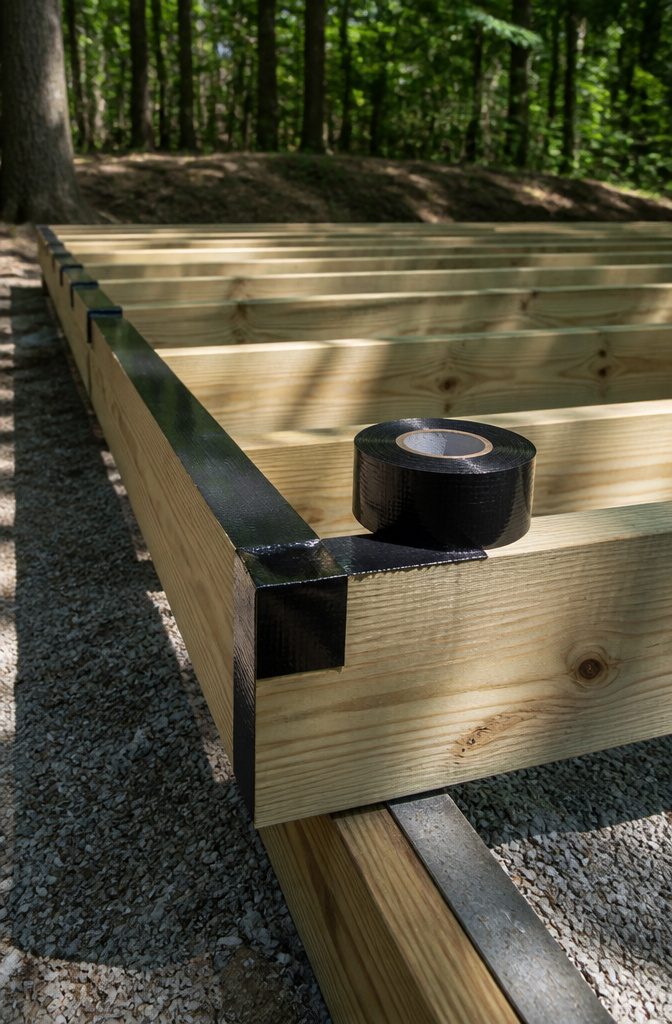
Ground-level decks sit closer to moisture than anything raised on posts, and that difference matters more than most people expect when they are standing in the lumber aisle.
The frame is pressure-treated, but the treatment only slows rot; it does not stop it.
Water that pools on joists or seeps into the gaps between boards has nowhere to go, and on a low deck it lingers longer because air does not move underneath the way it does with a taller structure.
Joist tape or a protective membrane across the tops of every joist and beam buys years by blocking that penetration.
The membrane creates a physical barrier so water runs off the sides rather than soaking into the top grain, which is the entry point where most framing rot begins.
Cut pieces to full length, press them firmly into place, and do not leave gaps at seams.
The small cost in time and material here is what keeps the frame from becoming the part of the project you have to rebuild first.
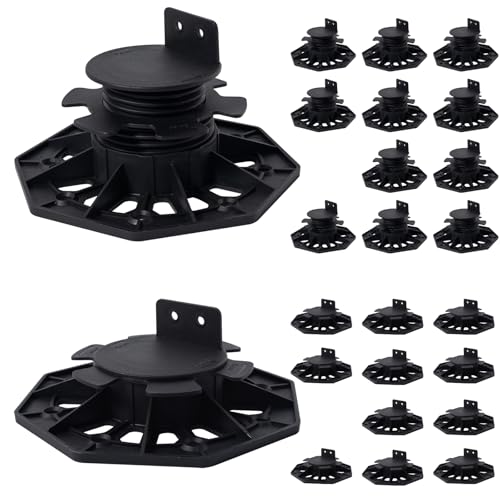
Simple and convenient: When installing the plastic wood floor, you only need to drill screws through the small holes on the upper plate and fix it on the keel to maintain the...
6. Lay the Decking
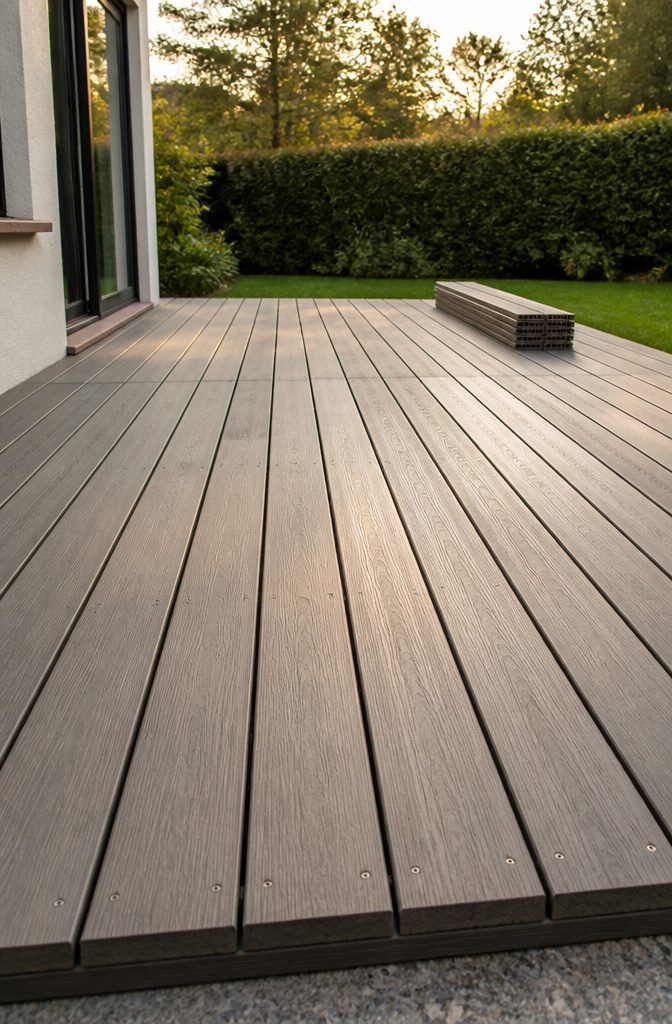
- Gather your boards before you start. Composite decking comes in 8-, 12-, 16-, and 20-foot lengths; pressure-treated lumber already did the work underneath as your frame. Matching the board length to your joist span means fewer cuts and less waste.
- Set your gaps from the first board. Drainage depends on it, and composite still swells and shrinks with the seasons even though it resists moisture better than wood. The manufacturer’s spacing printed on the box is the number to follow here, not a guess.
- Choose your fastener now, because it changes the whole look. Face screws with exterior-rated bits work on any board and pull up easy later if something warps; hidden clips need a grooved edge but leave the surface clean. I have used both, and face screws won on speed every time, though a plug system in a matched color comes close to hiding them on composite.
- Run a string line every third or fourth row to keep things straight. Before you sink the last board, check that the gap at each end of the frame matches. Tweak the spacing across the field if you need to, so that final board lands even with the rim joist without a ripped strip.
7. Trim the Ends
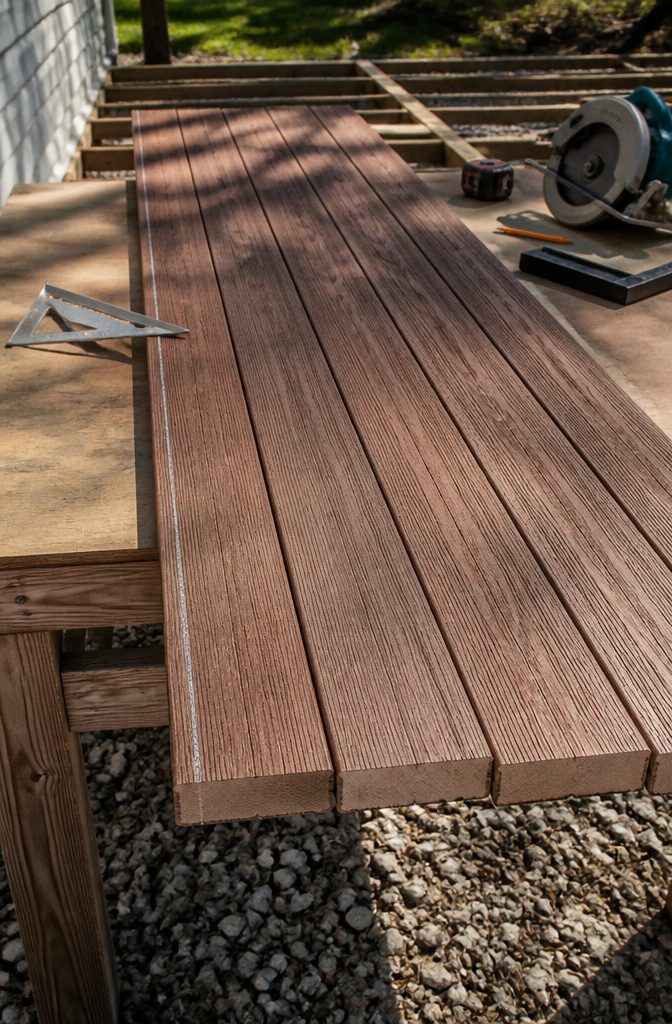
Factory ends on deck boards are rarely square, so the first cut needs to trim about half an inch to set a clean, square edge before you measure.
That trimmed end becomes your new reference point; every board gets cut from there so the deck line stays straight.
I like to run boards long on one or both ends and trim them after they are fastened.
A chalk line or straightedge lets you cut the whole row at once, and the picture-frame board on the opposite side drops in against a clean edge.
Track saws make this almost trivial if you have one, but a framing square and circular saw with a sharp blade work fine.
What this saves is accounting for tiny shifts in the frame.
Measuring each board to length ahead of time sounds precise, but once joists settle or a post drops an eighth of an inch, those pre-cuts leave gaps or overhangs. Trimming in place absorbs those imperfections without you noticing.
8. Install the Fascia

Fascia boards turn the messy edge of your rim joists into something that looks finished from the yard.
I cut each piece to length and dry-fit it before driving any fasteners, because a board that looked straight on the pile might show a cup or bow once it’s up against the framing.
A second check at this stage costs nothing and saves the headache of prying out screws later.
The outside corners look cleaner if you miter them, but leave a small gap at every miter joint for expansion. Composite and PVC fascia move the most, but even pressure-treated lumber swells and shrinks across the seasons.
Fasten the boards into the rim joist with the screws the manufacturer lists for the job, and watch the depth: overdriving them leaves dimples that catch water and shadow lines you’d notice every time you walk past.
9. Add the Steps
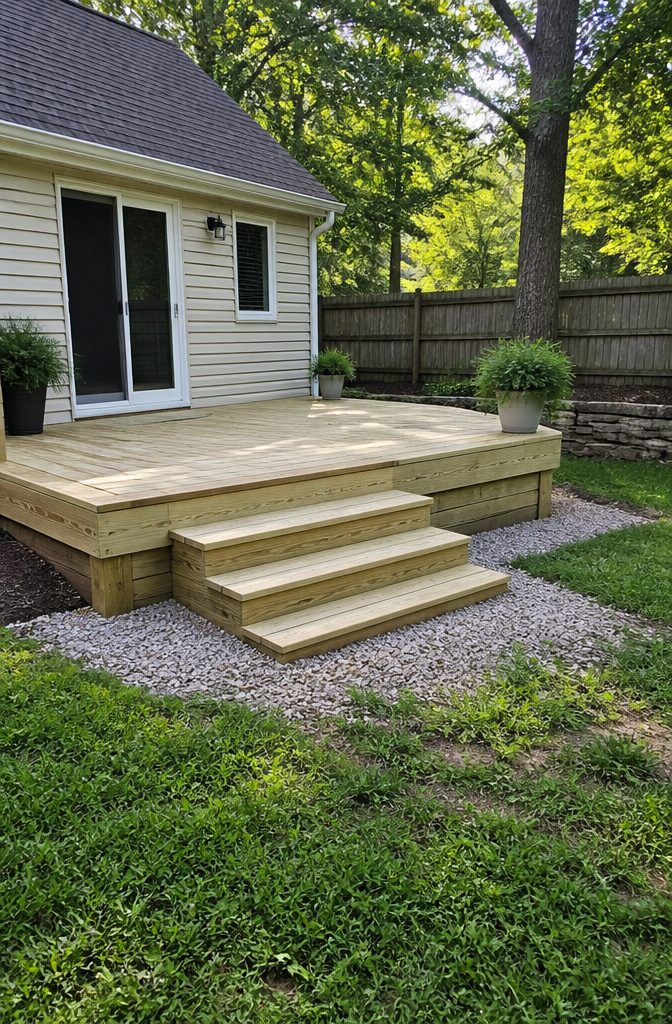
Low decks sitting under 30 inches above grade typically skip stairs altogether, and that’s exactly why they stay cheap and fast to build.
No guardrails, no posts, no bracing: the framing stays simple, the lumber list shrinks, and you spend less time on a ladder.
I did add three steps on one side of my own build because the yard slopes away from the house just enough to create a trip hazard at the edge.
The footings for those steps still had to sit level with the main deck’s foundation, so I used the same deck blocks and cut 4×4 posts to hold the beams at matching height across the run.
Hurricane ties and the specialty screws the hardware store stocks for them kept the beams locked to the posts.
If your site stays flat from the deck edge outward, a single ground-level Platform is safer and smarter. Steps introduce extra frost heave risk, another joint to maintain, and the one weekend this project is supposed to take.
10. Enjoy Your Deck
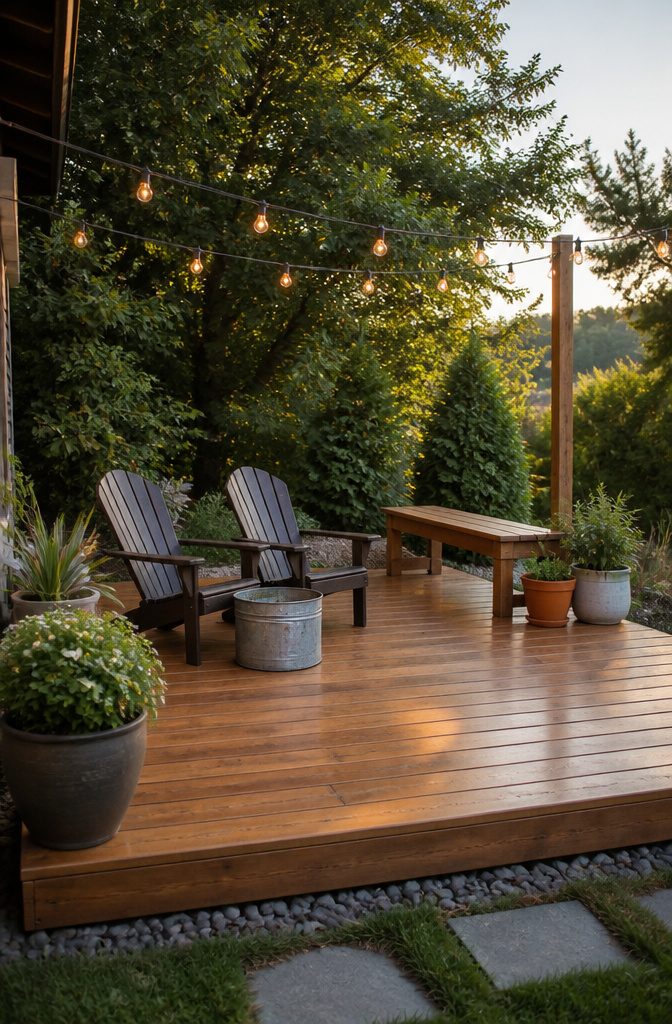
A basic floating deck built on concrete blocks ran about $500 total for pressure-treated lumber and screws.
Stack cinder blocks if the ground slopes, level them with a torpedo level, and call it done; the deck sits there without a ledger board or frost footings to fuss over.
I keep mine spare. Two Adirondack chairs from a garage sale, a galvanized bucket for iced drinks, and string lights looped through a metal plant hanger I bolted to the joists.
The hanger pulled out once because I threaded it into decking instead of framing. Pilot bit, then lag bolt into the rim joist; check it every spring.
Plants in nursery cans or a single runner from a hardware store aisle work fine.
I skip the outdoor rug because it traps water and the boards stay damp underneath. A bench built from leftover joist material gives seating that matches the grain and costs nothing extra.
The deck marks an end to the project.
Spend the weekend setting it up, then sit with something cold and let the next project wait a month. It will.
Material Selection
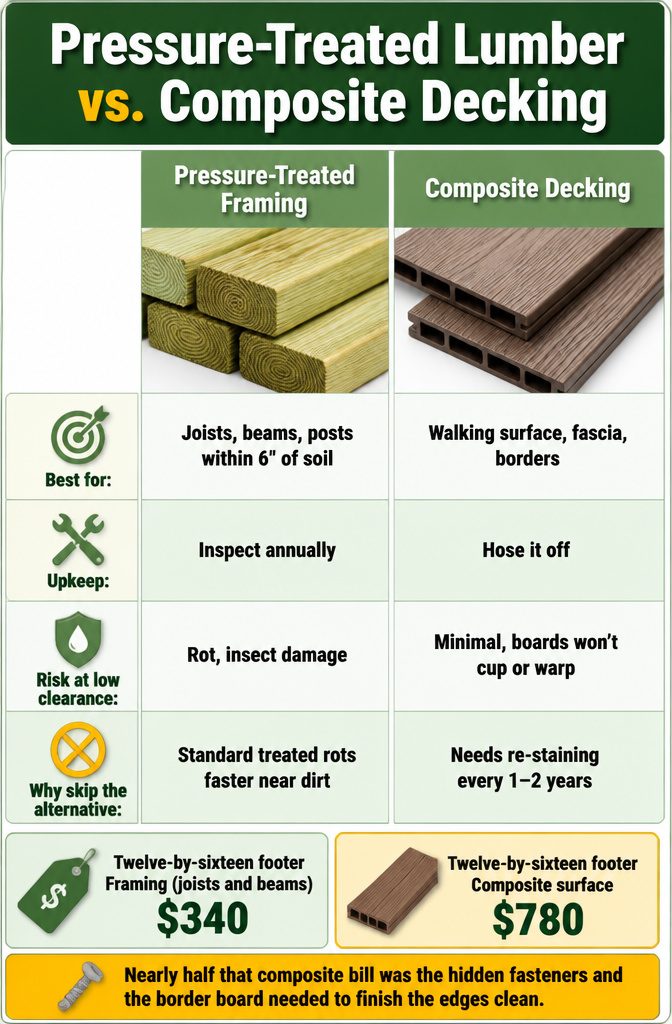
A ground-level deck sits too close to the dirt to risk soft lumber. Pressure-treated lumber rated for ground contact belongs in the frame, because the higher preservative load is what keeps joists from rotting where clearance drops below six inches.
Composite decking costs more up front, but it pays back on weekends, no sanding or sealing needed, and the moisture resistance matters more when air barely moves underneath.
| Pressure-Treated Framing | Composite Decking | |
|---|---|---|
| Best for | Joists, beams, posts within 6" of soil | Walking surface, fascia, borders |
| Upkeep | Inspect annually, replace if splits deepen | Hose it off |
| Risk at low clearance | Rot, insect damage | Minimal; boards won’t cup or warp |
| Why skip the alternative | Standard treated rots faster near dirt | Natural wood needs re-staining every 1–2 years |
I priced the framing for a twelve-by-sixteen footer last spring.
The joists and beams ran about $340, the composite surface about $780. Where the money goes is invisible: nearly half that composite bill was the hidden fasteners and the border board needed to finish the edges clean.
The treated lumber was cheaper, but I still bought the ground-contact grade, not the standard stuff on the next shelf down.
Site Preparation and Drainage
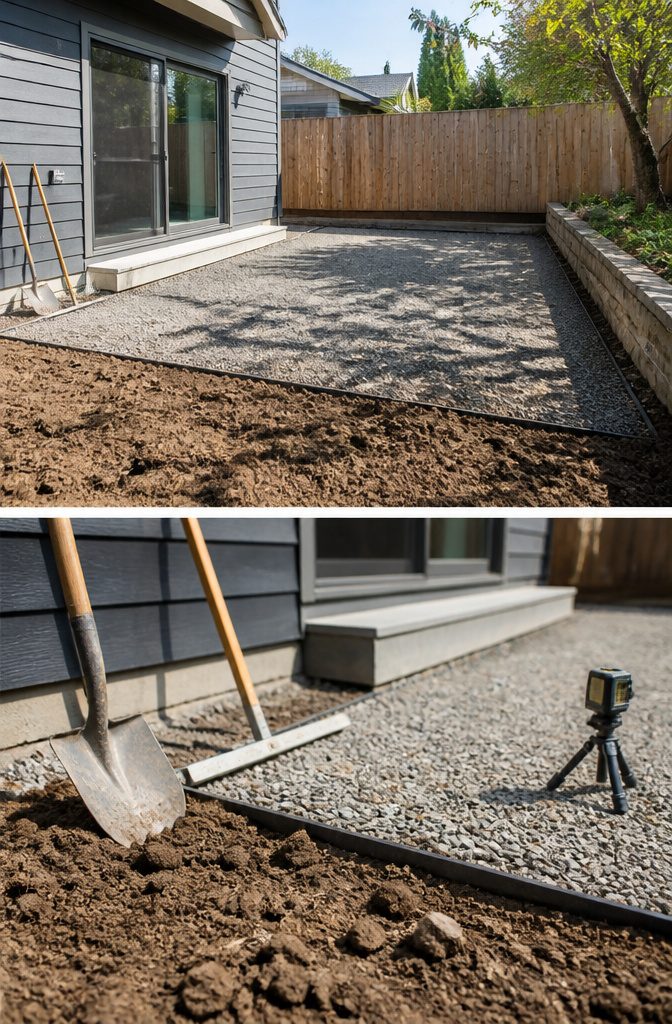
- Strip the sod with a flat shovel or rent a sod cutter if the area is more than about ten feet across; you want bare soil with no grass roots left behind to rot and settle later.
- Check for level with a long straightedge and a laser level or string lines; dig down high spots rather than building up low ones, because loose fill compacts unevenly under the weight of a deck.
- The soil itself dictates how much work this takes. Rocky ground needs a mattock and patience; sandy soil shifts and may need a slightly thicker gravel bed to stay put.
- Once the ground is level, slope the entire site gently away from the house, dropping about one inch for every six to eight feet of run. This is the move that keeps water from pooling against your foundation and under the joists.
- Spread a gravel sub-base two to four inches deep across the whole area. Crushed stone or clean gravel lets water drain through instead of sitting beneath the deck boards to breed mold and rot.
- Compact the gravel with a plate compactor, or if the budget is tight and the layer is thin, a hand tamper and a rented compactor only for the perimeter where foot traffic will be heaviest. Walk the site after rain to see where puddles form, and add or shift gravel before you frame anything permanent.
Permitting and Regulations
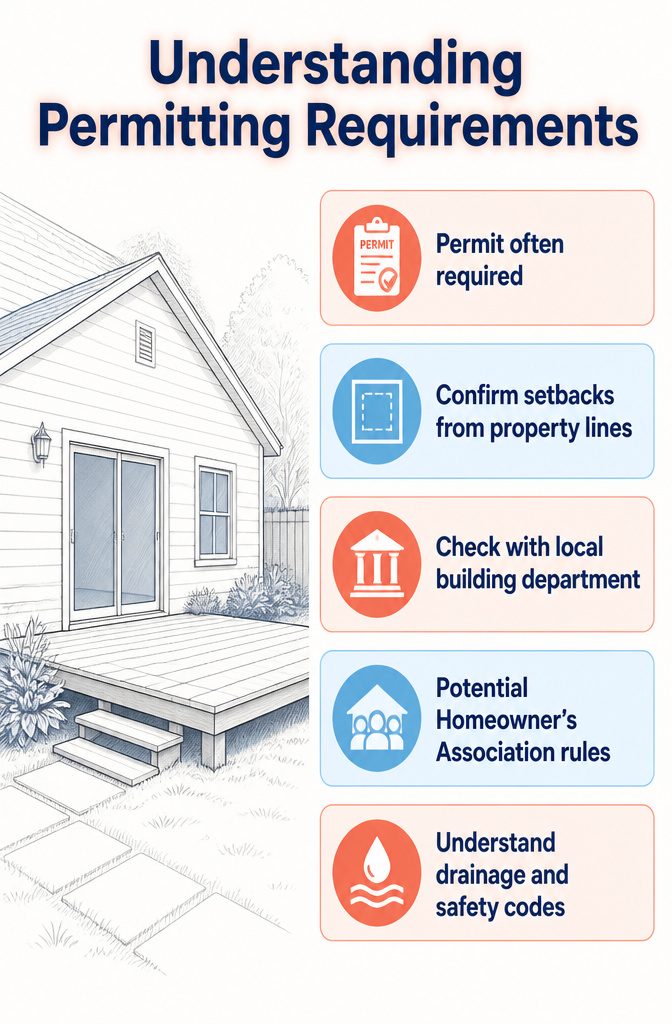
Most municipalities treat a ground-level deck the same as any other structure, which means a permit is likely required before you dig a single hole or set a single block.
The application itself forces you to confirm setbacks from lot lines, easements, and neighboring structures, and it flags any Homeowner’s Association restrictions that could scrap your plan after you’ve already spent the weekend on it.
The footing question is where local codes diverge most.
Some jurisdictions accept deck blocks for low profiles; others mandate frost-depth footings regardless of height. One office might approve a floating frame on well-draining soil, while the adjacent county wants concrete piers down to the freeze line on principle.
The only reliable way to know which rule applies to your yard is to ask your building department directly, with your site dimensions and your intended height in hand.
Drainage and safety requirements written for full-elevation decks often get applied to ground-level builds by default, so the conversation is worth having even if you think your project is too small to matter.
Building without that answer, then getting flagged during resale or a neighbor’s complaint, costs far more than the permit ever would.
Common Mistakes
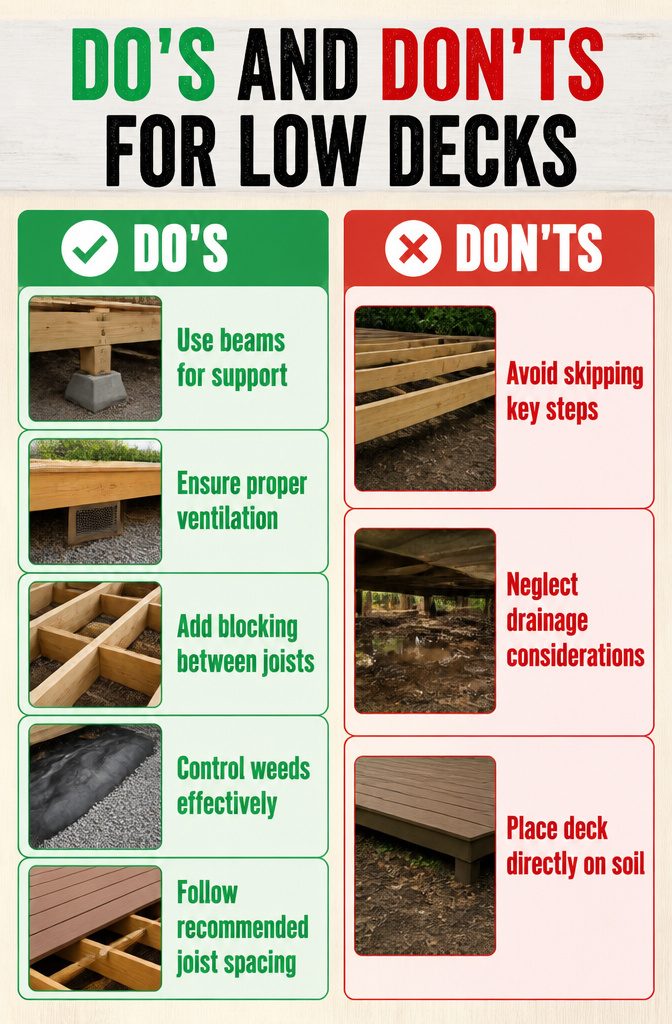
Ground-level decks tempt you to skip steps that taller builds force you to remember.
I almost did. The frame fails in this spot if you let it:
- Not using beams. Joists cannot span free from corner to corner. They need intermediate bearing from a beam, deck blocks, or pedestals. Without it, the surface sags and shifts underfoot.
- Poor ventilation. Trapped moisture rots the frame from below. Air has to circulate beneath the joists, and water has to drain away, not pool.
- Skipping blocking. The gaps between joists need solid blocking to stiffen the frame and cut bounce. The difference underfoot is immediate.
- No weed control. Landscape fabric under the deck keeps growth from pushing through, and a layer of gravel on top holds it in place.
- Wrong joist spacing. Composite decking usually needs closer spacing than wood. Exceed the span table and the surface goes spongy, and the warranty goes void.
Owners on Reddit mention decks laid straight on dirt that rotted to nothing, which is what happens when ventilation and drainage both fail.
Frequently Asked Questions
Do you need footings for a ground-level deck?
Yes, even a low deck may require frost-depth footings or approved deck blocks, depending on local building codes. A quick call to your local building department will tell you which rule applies to your yard before you start digging.
Are ground-level decks easier to build?
Yes, because they typically sit less than 30 inches above grade, ground-level decks usually skip stairs, guardrails, posts, and bracing. That simpler framing cuts both material lists and ladder time.
Do ground-level decks cost less?
Yes, the simpler structure and reduced material needs make a freestanding, ground-level deck an efficient way to create a defined outdoor living space.
How close can a deck be to the ground?
There is no universal minimum, but most builders try to maintain at least six inches of clearance between the ground and the bottom of the beams.
Below that, damp cycles sit against the lumber and start deterioration you will not see until it is expensive.
Can I use 2×4 for ground level deck joists?
Composite boards usually need the tighter spacing, while solid wood can run the wider one.
How to make a deck on uneven ground?
Dig down high spots rather than building up low ones, because loose fill compacts unevenly under the weight of a deck.
Stack cinder blocks if the ground slopes, level them with a torpedo level, and cut posts to matching height across the run.
What is the best material for a ground-level deck?
Pressure-treated lumber rated for ground contact belongs in the frame, because the higher preservative load keeps joists from rotting where clearance drops below six inches.
Composite decking costs more up front but resists moisture better and needs no sanding or sealing, which matters when air barely moves underneath a low deck.