
Start by prepping your tub. Remove old caulk, scrub it thoroughly with heavy-duty cleaner, and repair any chips with epoxy filler.
Next, protect surrounding areas with tape and plastic sheeting, then sand the tub surface to create texture for better adhesion.
Finally, apply your bonding agent and refinish topcoat in smooth, even strokes, wait thirty minutes, carefully remove the masking tape, and recaulk the edges.
Proper timing and technique will produce professional-looking results.
Prep Your Bathtub Surface (Remove Caulk, Clean & Repair)
Before you can refinish your bathtub, you’ll need to prep the surface thoroughly. Start by removing the overflow plate above the drain and cutting out the old caulk. Use a 4-inch wallpaper scraper to ensure clean edges for your new finish.
Next, tackle the heavy cleaning. Scrub your entire tub with a heavy-duty cleaner and scrub pad, getting into those hard-to-reach spots under the soap dish where soap scum and mineral buildup hide. Once it’s clean, repair any chips or cracks with epoxy filler and let it dry completely.
After that, sand the repaired areas smooth and flush. Set up drop cloths and protective coverings to create a dust-free prep area. Vacuum thoroughly, then resand everything until you have a pristine surface ready for refinishing.
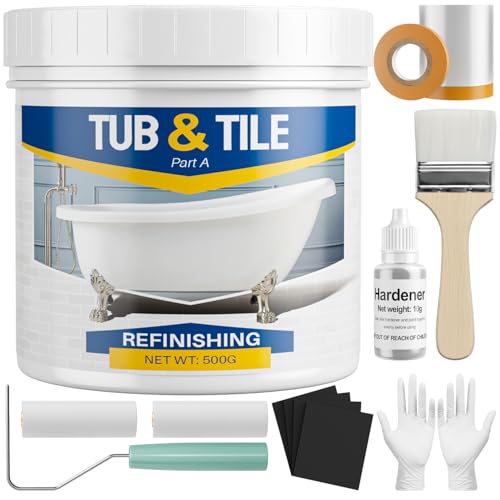
Complete Bathtub Refinishing Kit: Whether you're a beginner or a professional, our tile paint and tub paint is perfect for you. You'll receive a practical package containing: User Manual x 1, Composite Emulsion (Component A) x 1, Hardener (Component B) x 1, Brush x 1, Masking Tape x 1, Masking Film x 1, Gloves x 1, Rollers x 2, Sandpaper x 4. This tile paint meets your daily needs and enhances your quality of life

【Acrylic Formula】Our tub paint boasts an advanced water-based acrylic formula designed for durability and longevity. The high-quality acrylic resin ensures a strong, resistant finish that combats flaking and wear, providing a lasting transformation for your tiles
Protect & Prime the Tub (Mask, Sand & Apply Bonding Agent)
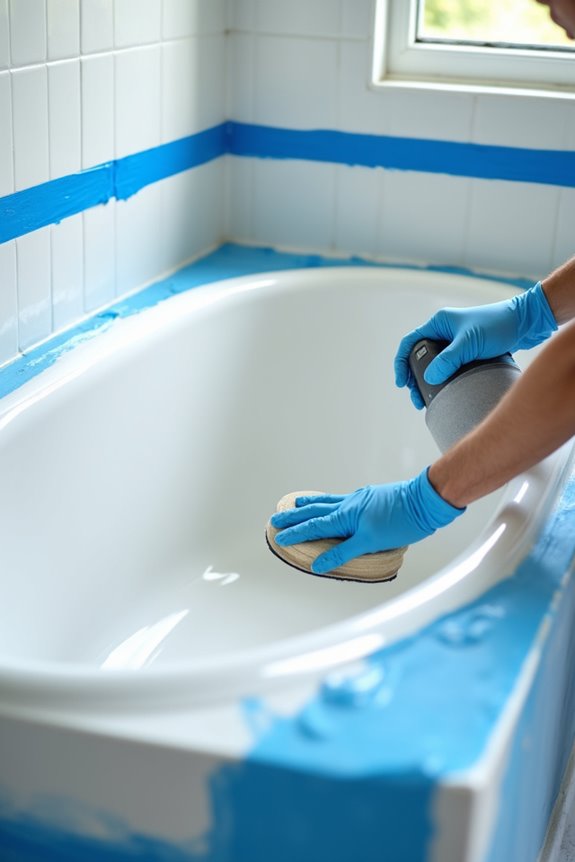
Now that your tub’s clean and repaired, it’s time to protect everything around it before you apply the new finish. Start by masking surrounding tile and flooring with tape and plastic sheeting. Cover your drain and fixtures so they stay safe during refinishing.
Next, sand the tub surface to create a rough texture that helps the new coating stick. This roughness improves adhesion between the old surface and your glaze. Make sure the tub is completely dust-free before moving forward. Any particles will show in your final finish.
Apply a bonding agent across the entire surface after priming. This step ensures strong bonding and a durable result. Keep your workspace well-ventilated to manage fumes safely throughout the priming stage.

Prepare and paint surface the same day with a tough, with tub and tile’s 2-part epoxy acrylic formula that withstands moisture and resists corrosion

Included: compound emulsion 500g/17.5 oz(part A), hardener 10g/ 0.35 oz(part B), user manual.

Specifically designed for the ceramic, porcelain or fiberglass surface such as bathtub, tile floor/wall, toilet, sink. DIY refinish your bathroom. One quick and easy spray step for a refresh look.
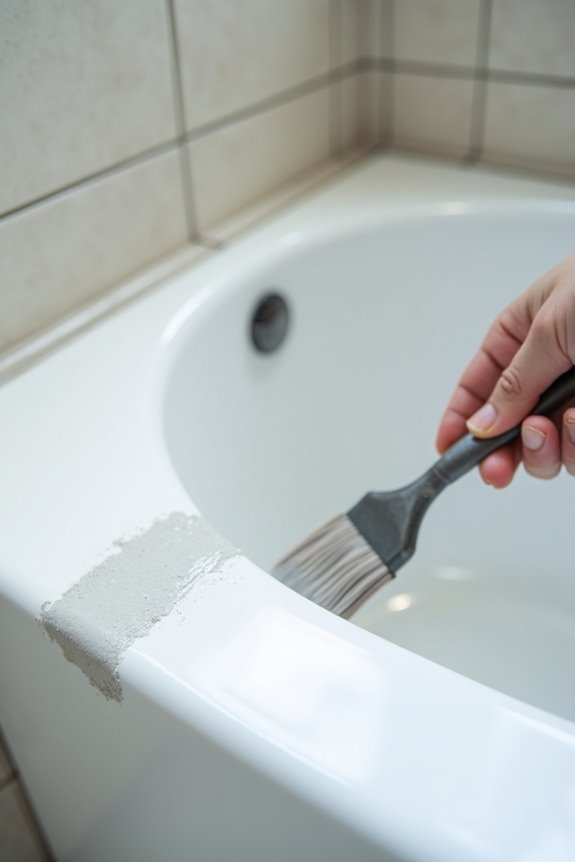
Apply the Refinish Topcoat & Recaulk
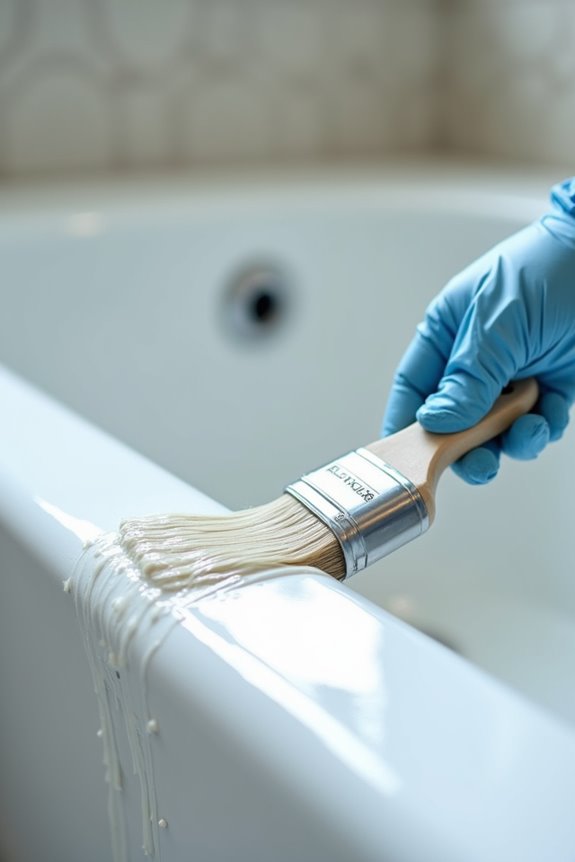
Ready to bring your tub back to life. Now apply the refinish topcoat and recaulk your bathtub.
Ready to bring your tub back to life with a fresh refinish topcoat and new caulking.
Here’s what you’ll do:
- Apply the topcoat in smooth, even strokes across your entire tub surface
- Wait about 30 minutes for the glaze drying process to complete
- Carefully remove your masking tape to reveal clean edges
- Recaulk around the tub edges 30–40 minutes after glazing to seal the edges properly
After your topcoat application, allow the full 30-minute post-coat curing time for proper setting. Once dry, peel off the masking tape slowly and carefully. Then recaulk to seal any gaps near tub overflows and edges. Reinstall your overflow plate only after caulking finishes.

Instantly Restore Glossy White Tubs Like New: Flawlessly cover ugly chips, cracks, holes, scratches, dents, peel and rust with a smooth glossy white finish that blends into tubs, sinks, showers and tile surfaces for seamless-looking repairs

1 MILLION HAPPY CUSTOMERS: Trusted worldwide, our repair kits have helped over a million people restore their favorite items to their original condition.

High Strength Bond & Durability: The porcelain repair kit offers strong adhesion and abrasion resistance, covering cracks, holes, etc. The waterproof, leak-proof, durable epoxy bathtub repair kit provide a brand-new, high-gloss porcelain-like finish for your sinks and tubs, with no yellowing even after years