
Which of these ideas is yours depends on how much of the room you’re allowed to change.
Renters can add a kitchen island or a breakfast bar, while owners can choose blue fronts, add a peninsula, or hang a sliding door from the ceiling to split the room.
Floor space narrows the choice further, because an island needs room that a peninsula doesn’t.
1. Kitchen Island
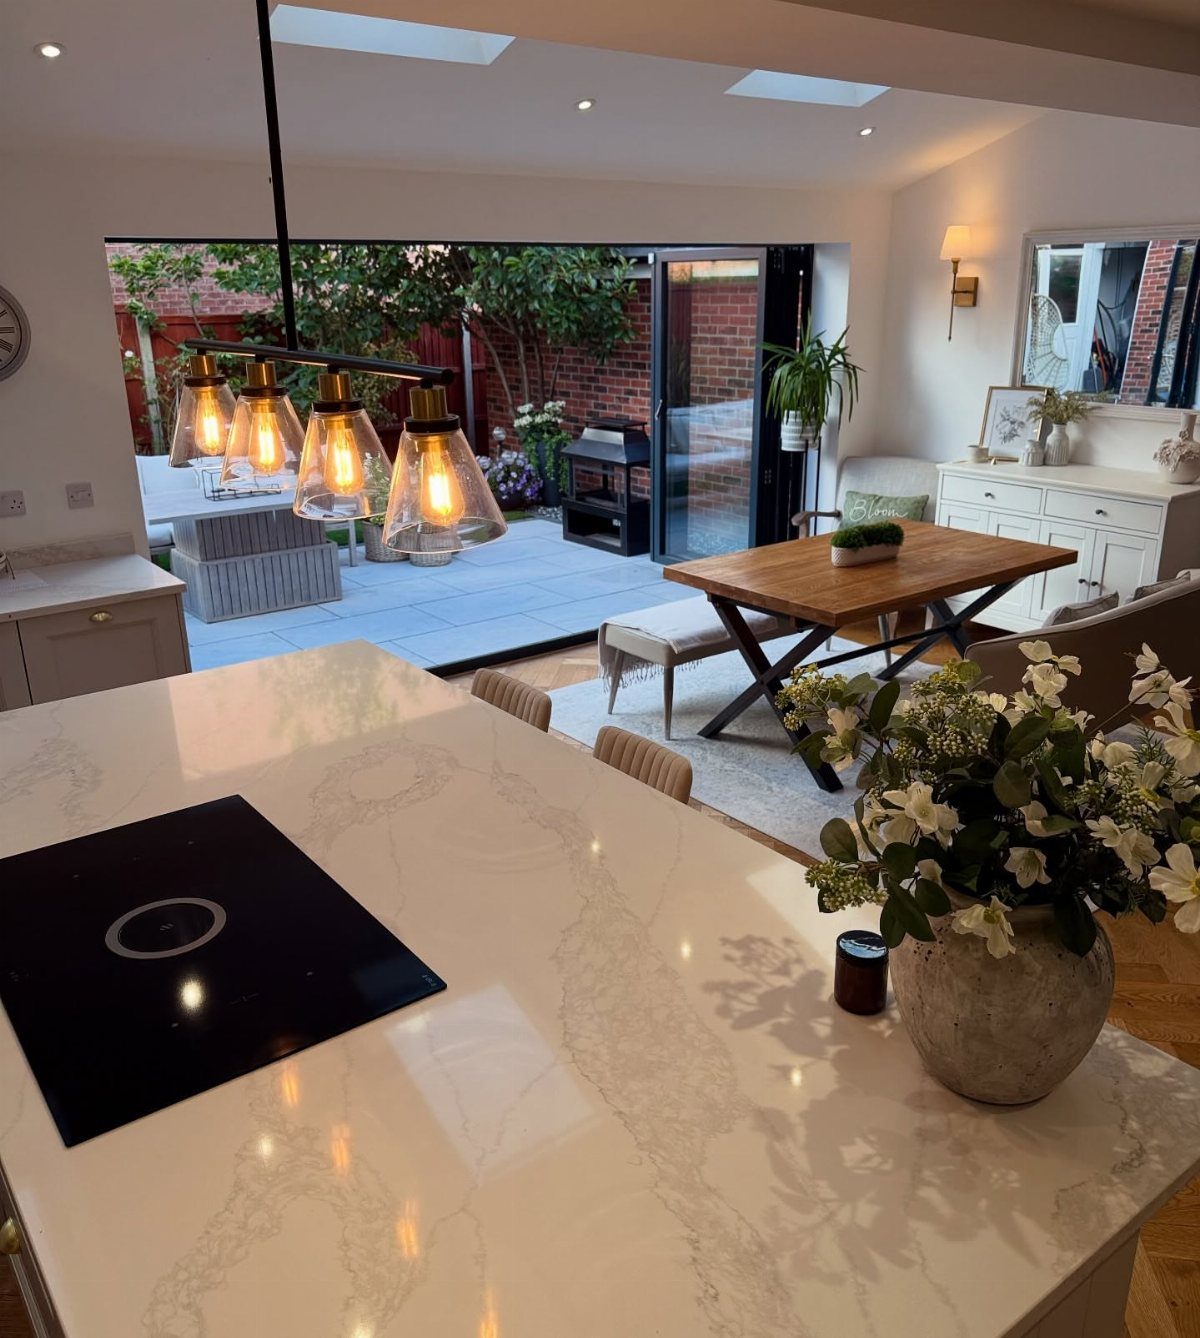
A kitchen island earns its footprint when it does 2 jobs: prep surface on the cook’s side, and a natural meeting point for everyone else.
White marble reads calm and bright, and it keeps the cooking zone from fighting with a wooden dining table just beyond it.
Setting the hob into the island puts the cook facing the room instead of a wall. Leave the island’s far side clear of clutter, and let a vase of flowers do the visual linking between kitchen and table.
2. Breakfast Bar
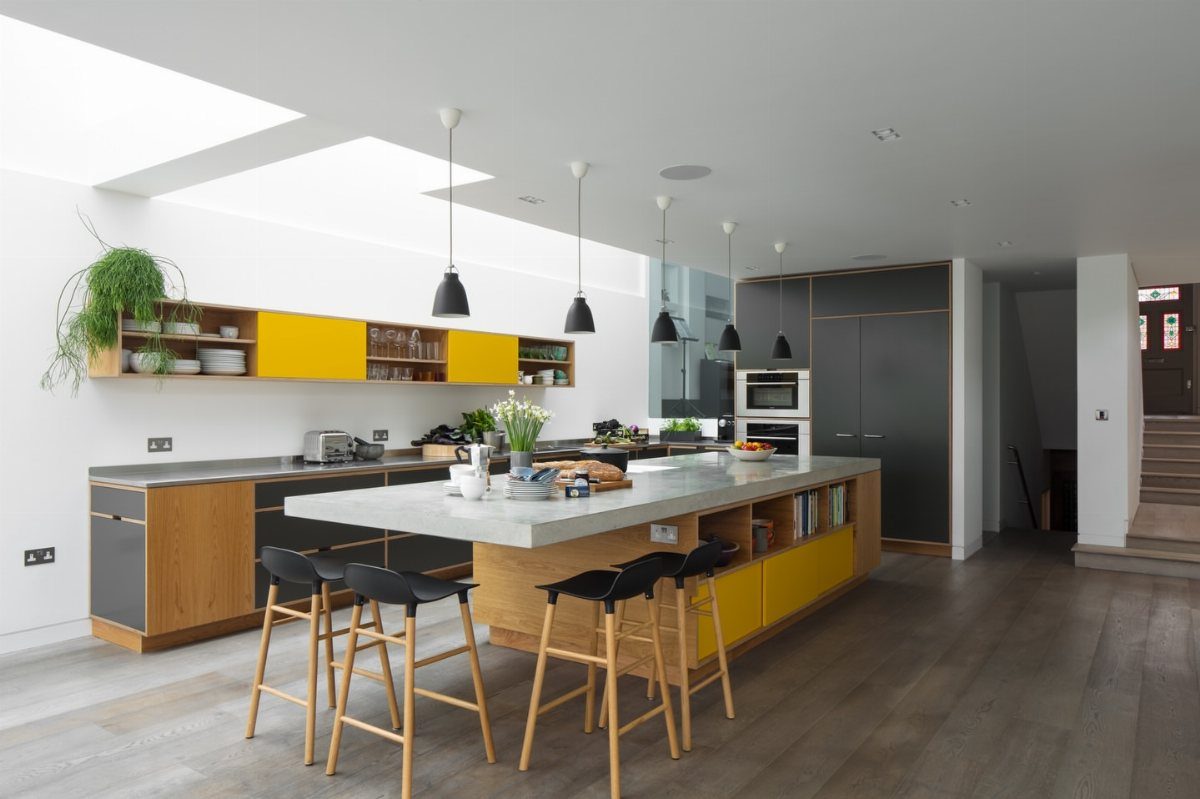
Black stools against a white countertop give a breakfast bar its graphic punch, and 3 is a sensible count for a bar this size.
Pull them in tight when not in use and the bar becomes a soft boundary: guests sit on the living side while the cook works on the other, with no wall needed.
Bright cabinetry like this yellow can carry a room by itself, so I keep the stools simple and dark. Quick breakfasts, homework, a laptop, all happen here without setting the dining table.
3. Peninsula Layout
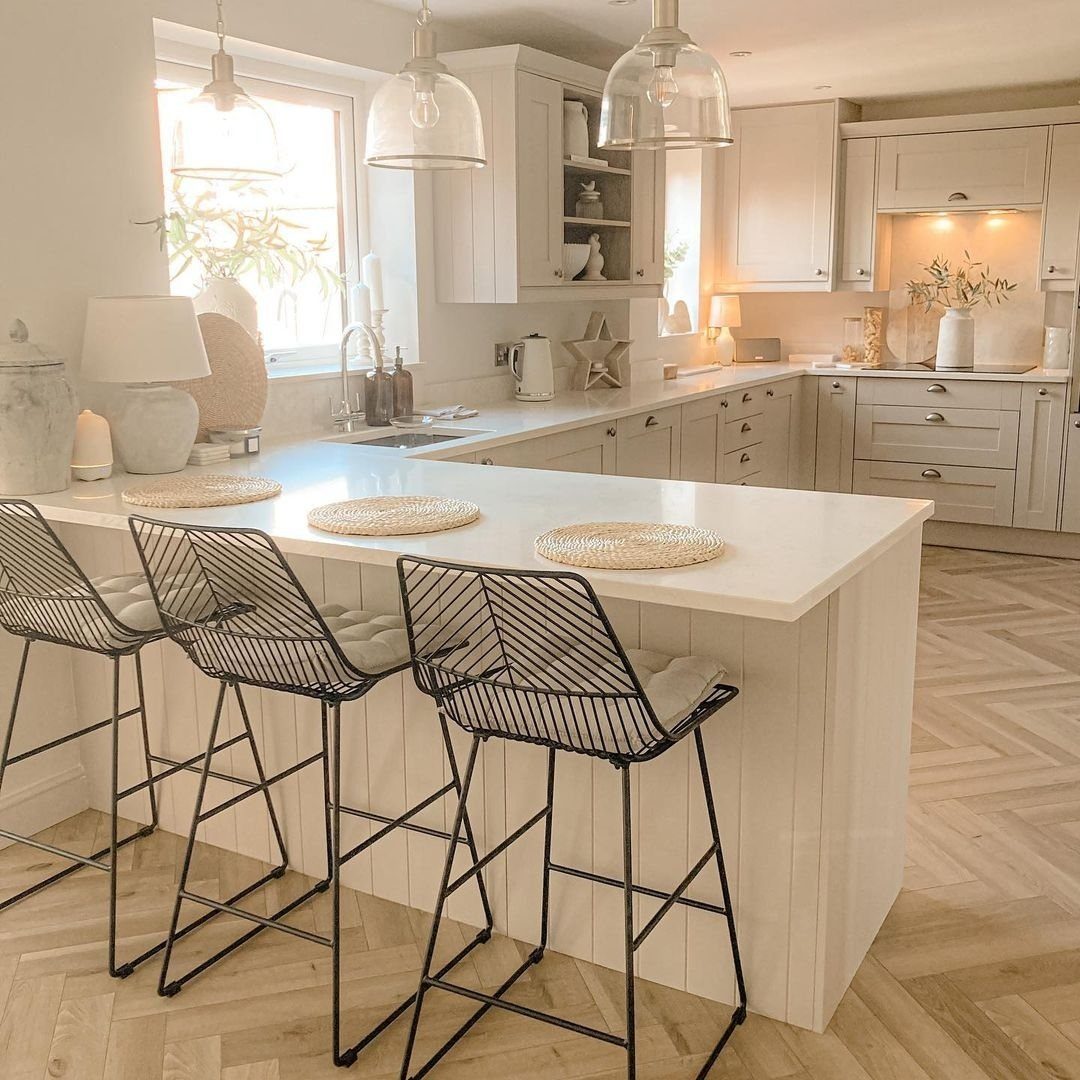
A peninsula is the island’s cousin for rooms that can’t spare the floor space.
It attaches to a wall or run of cabinets on one side, so you get prep room and seating while keeping a clear walkway on the open end.
Slim black wire stools like these take up little visual weight, which suits a small, bright kitchen.
Light herringbone flooring running through both zones helps the kitchen and dining area read as one room. If you rent, check what can be removed before planning, since a peninsula usually ties into existing cabinetry.
4. Shaker Fronts
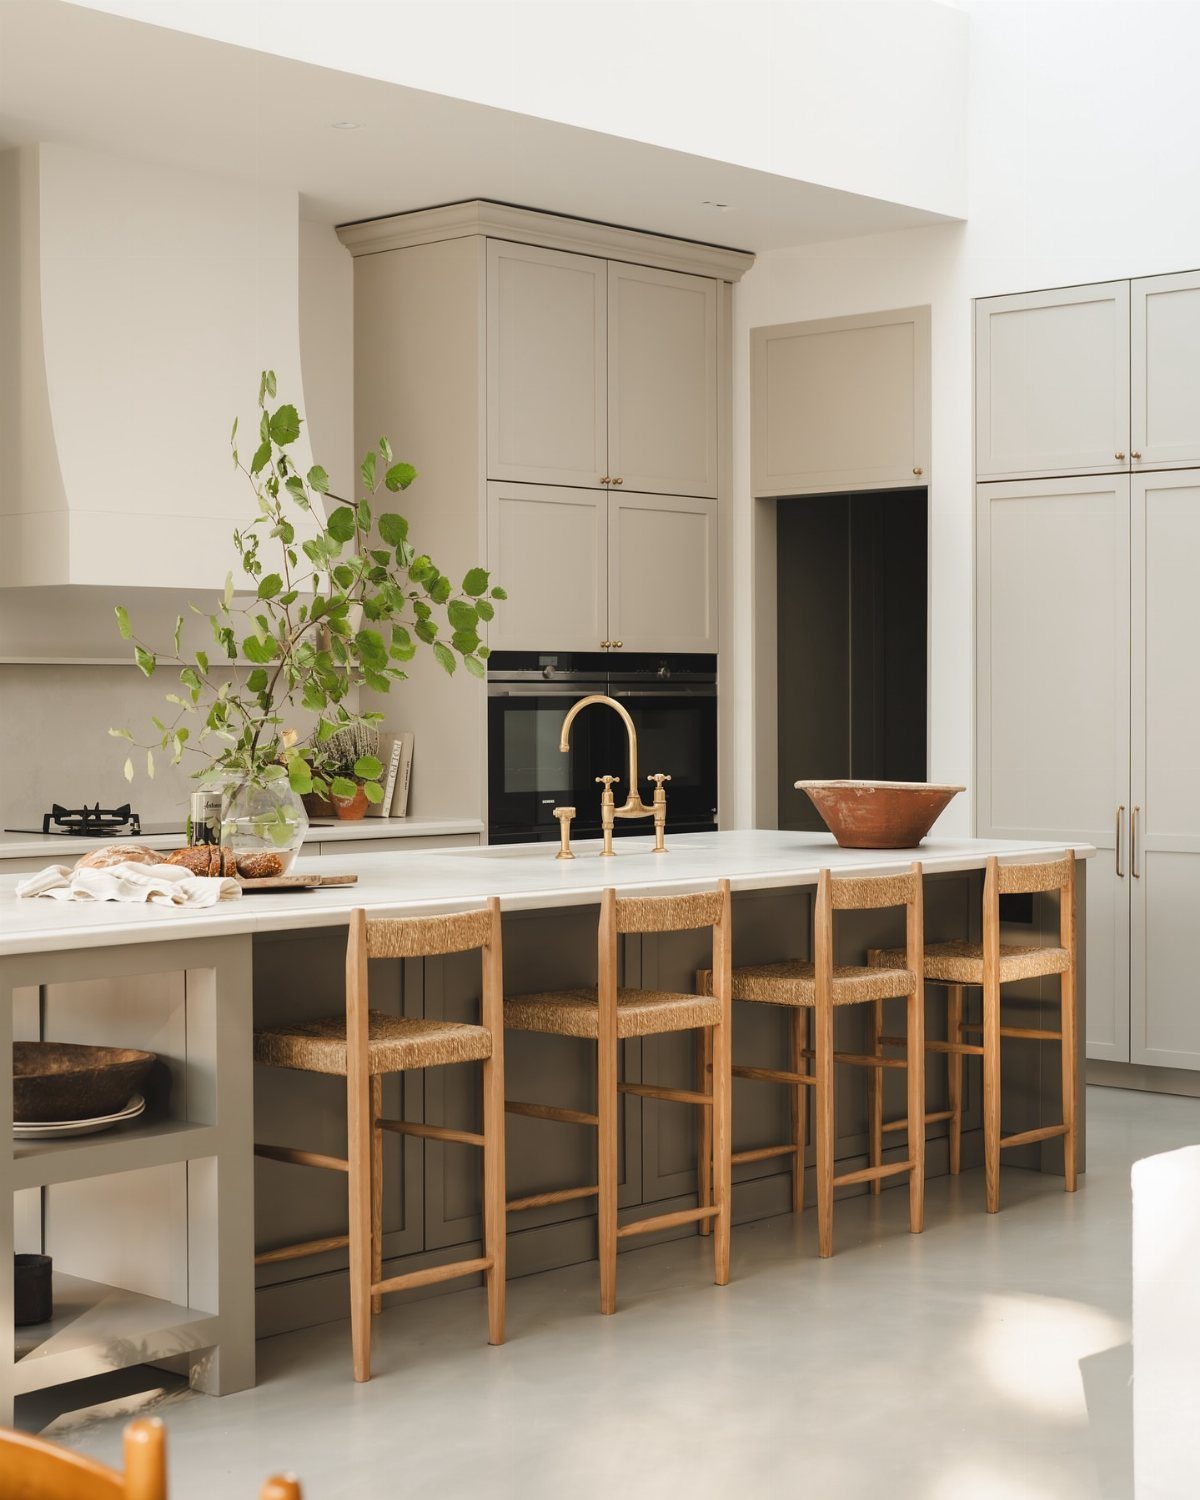
Shaker fronts are my pick for anyone who wants a kitchen that feels warm without looking old-fashioned.
The flat recessed panel is plain enough for modern rooms yet carries a classic, cosy character, and a soft grey paint keeps it light.
Pick one metal for hardware and tap so the finish stays consistent. Shaker doors do have grooves that catch dust and splatter, so expect to wipe the panel edges more often than flat doors.
5. Slab Cupboards
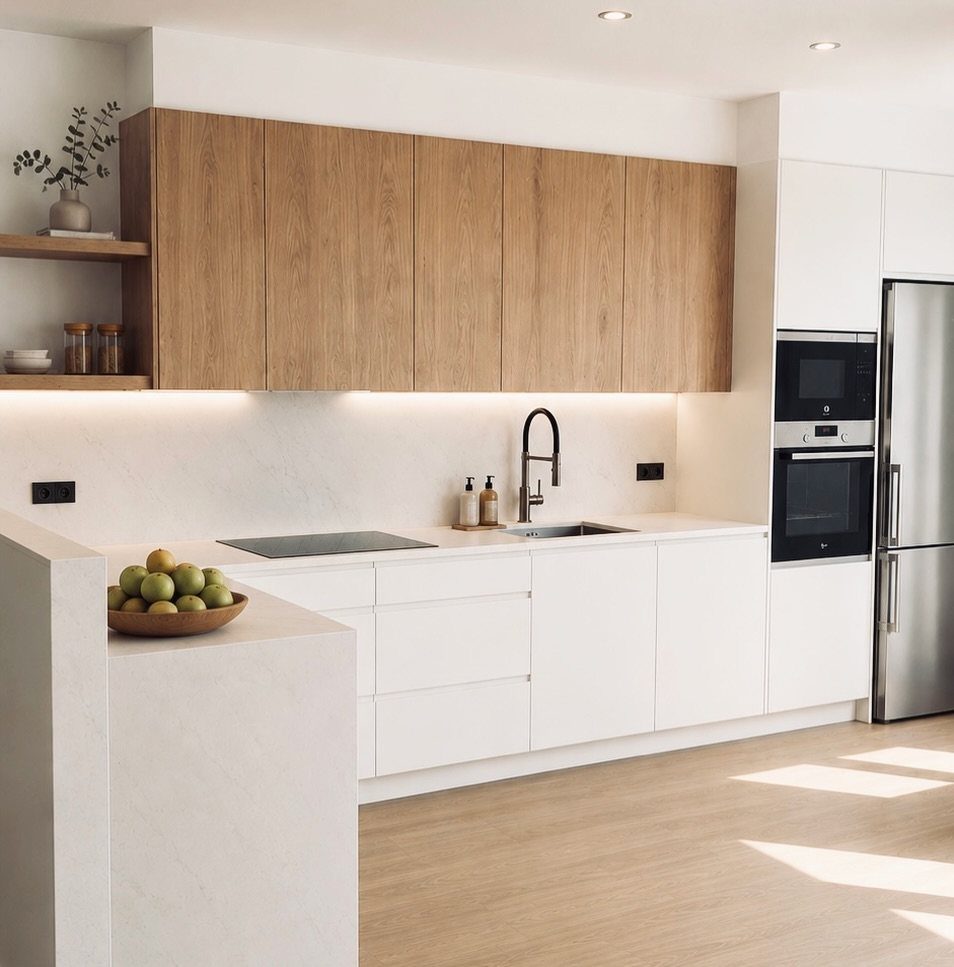
Slab cupboards, flat doors with no panel or molding, are what I reach for when the kitchen should step back and let the dining area lead. Without profile detail, the eye slides past them.
Splitting the colors, white below and light wood above, stops a flat-front run from looking sterile. The wood adds warmth at eye level while the white base keeps weight low.
Built-in appliances like the oven and a stainless refrigerator suit the same clean-lined approach. Bare slab doors show off any uneven gaps, so take care with alignment during installation.
6. Matt Finish
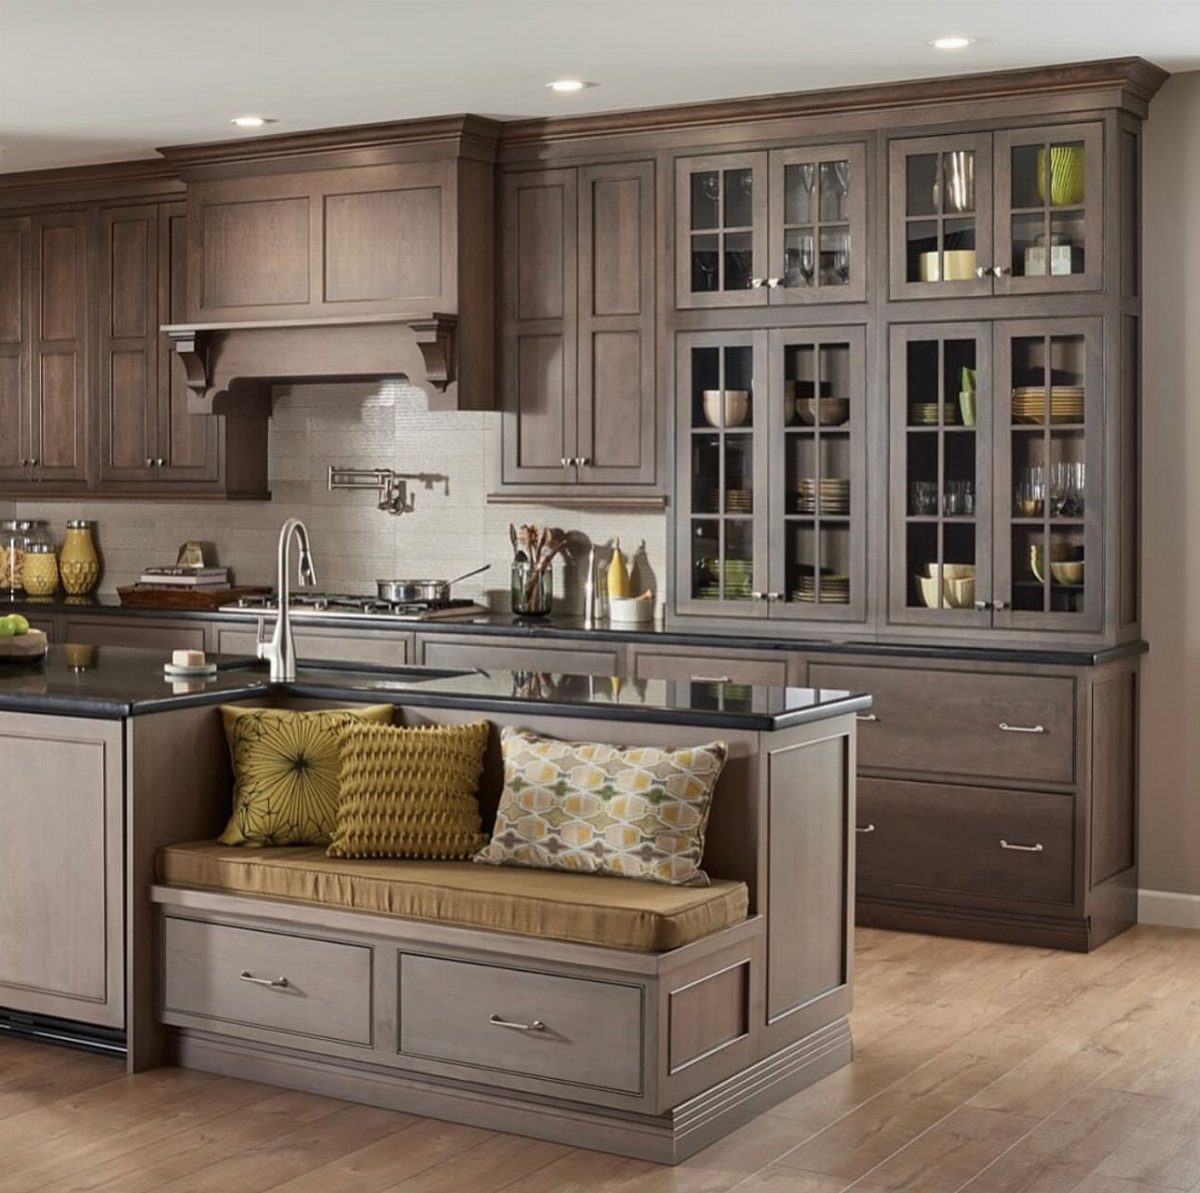
Matt cabinets absorb light instead of bouncing it, so a kitchen open to the dining area stays quiet when every surface is in view at once. A grey-brown tone with a dark countertop gives that calm a bit of depth.
A built-in bench seat with cushions turns the end of the run into a breakfast nook, and cushions in a single accent color, such as yellow, are an easy swap when you tire of them.
One thing to weigh: matt surfaces show fingerprints and grease more readily than glossy ones, so choose a finish you’re willing to wipe regularly.
7. White Cabinets
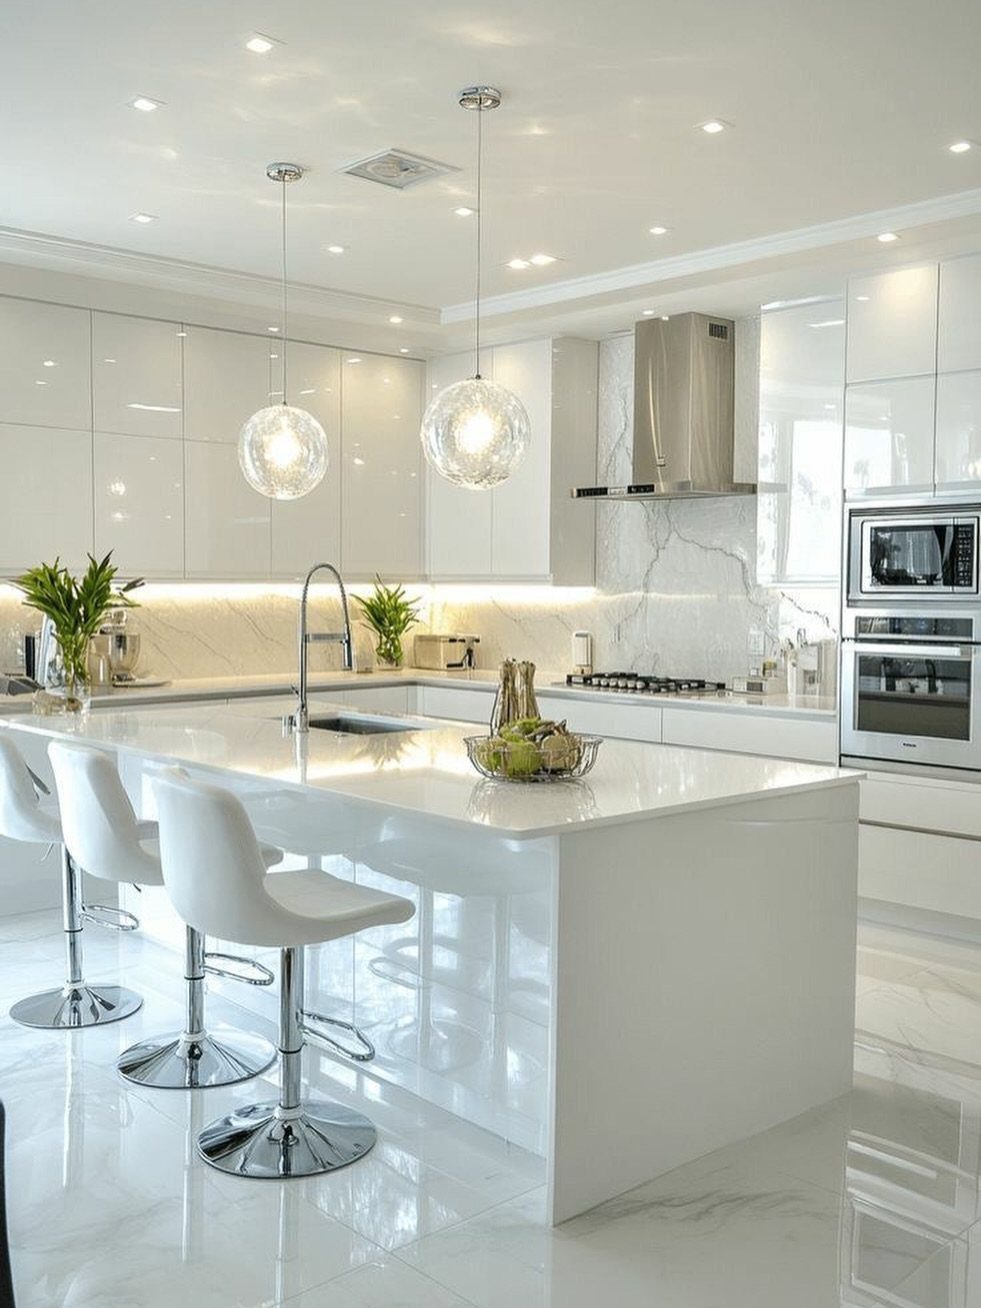
Glossy white cabinets bounce light back into the room, so a wall of storage can sit beside the dining area without crowding it.
A white island and white stools in the same tone keep the kitchen from splitting into separate pieces.
Stainless appliances give the white some contrast, and 2 round pendants over the island add shape without color. Gloss shows smudges, which I accept for the brightness; if that bothers you, pick a softer sheen.
8. Grey Units
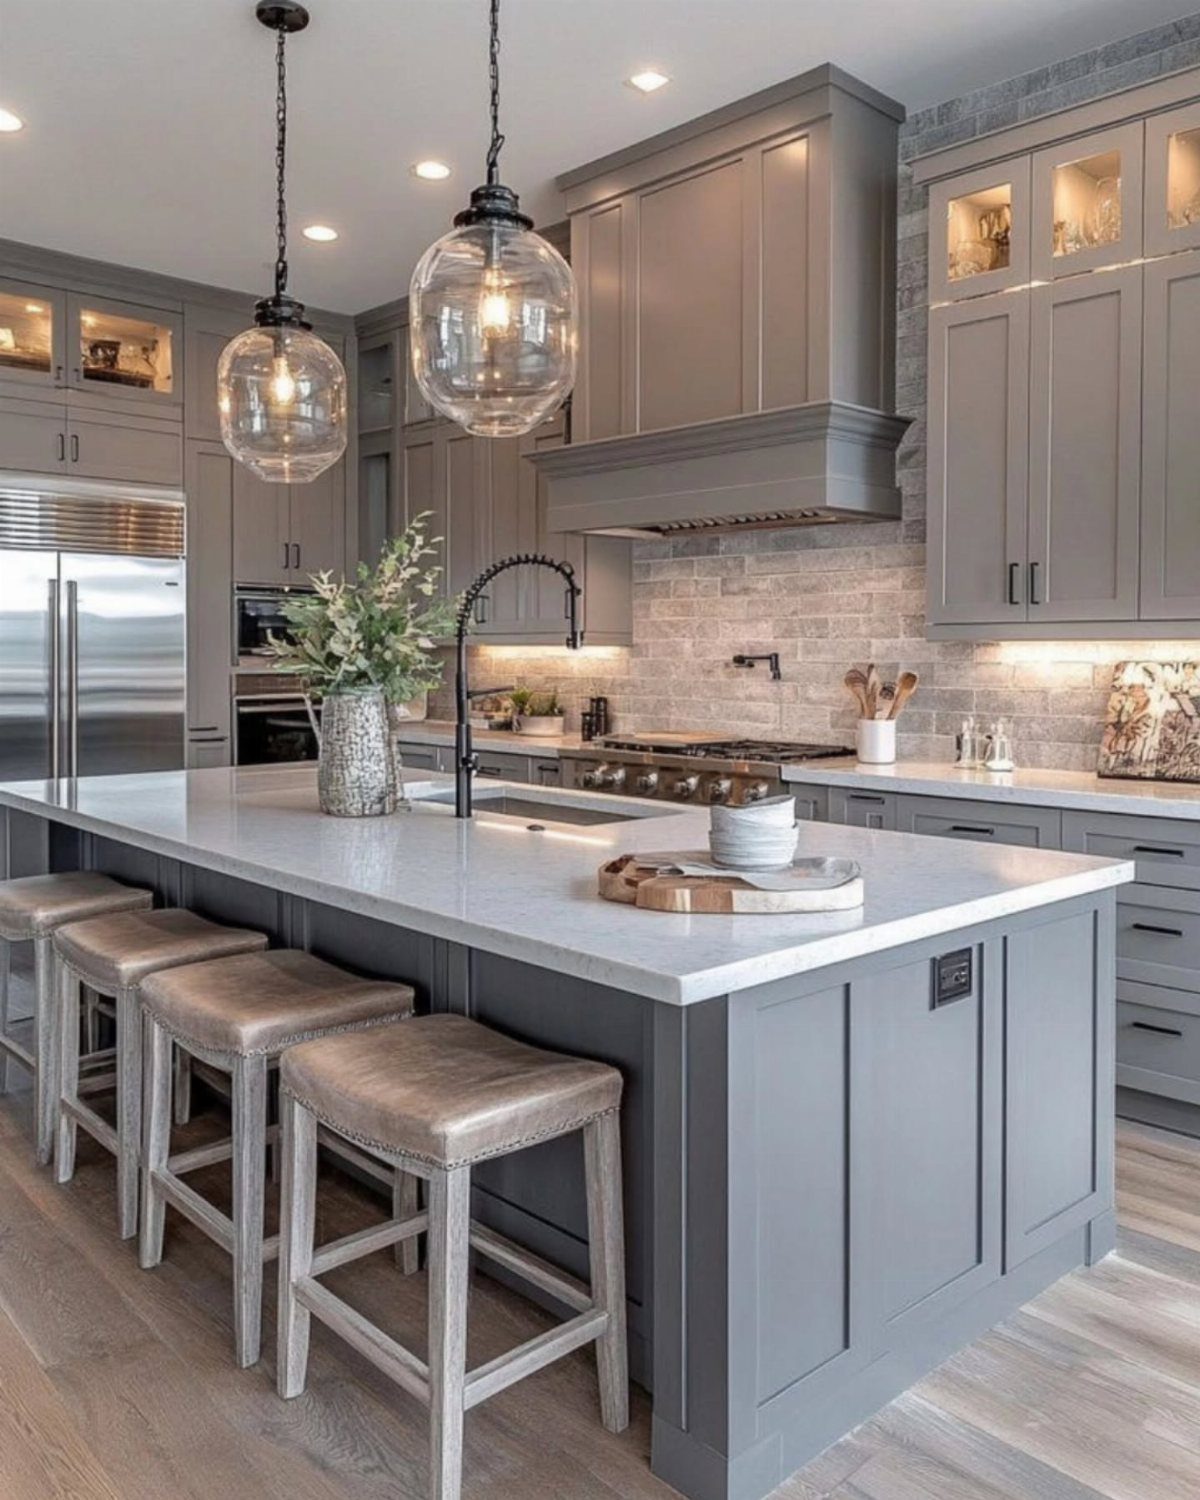
Grey is the cabinet color I suggest when the dining furniture, flooring or walls are still undecided. It sits quietly beside warm wood or cool paint, so the kitchen won’t fight whatever you add later.
Pair grey units with white counters, as here, and the island stays light while the cabinets give the room some weight.
Glass pendants keep sightlines open to the table. Measure the island’s length before you buy any stools, because a row that looks generous in a photo can crowd a real counter.
9. Blue Fronts
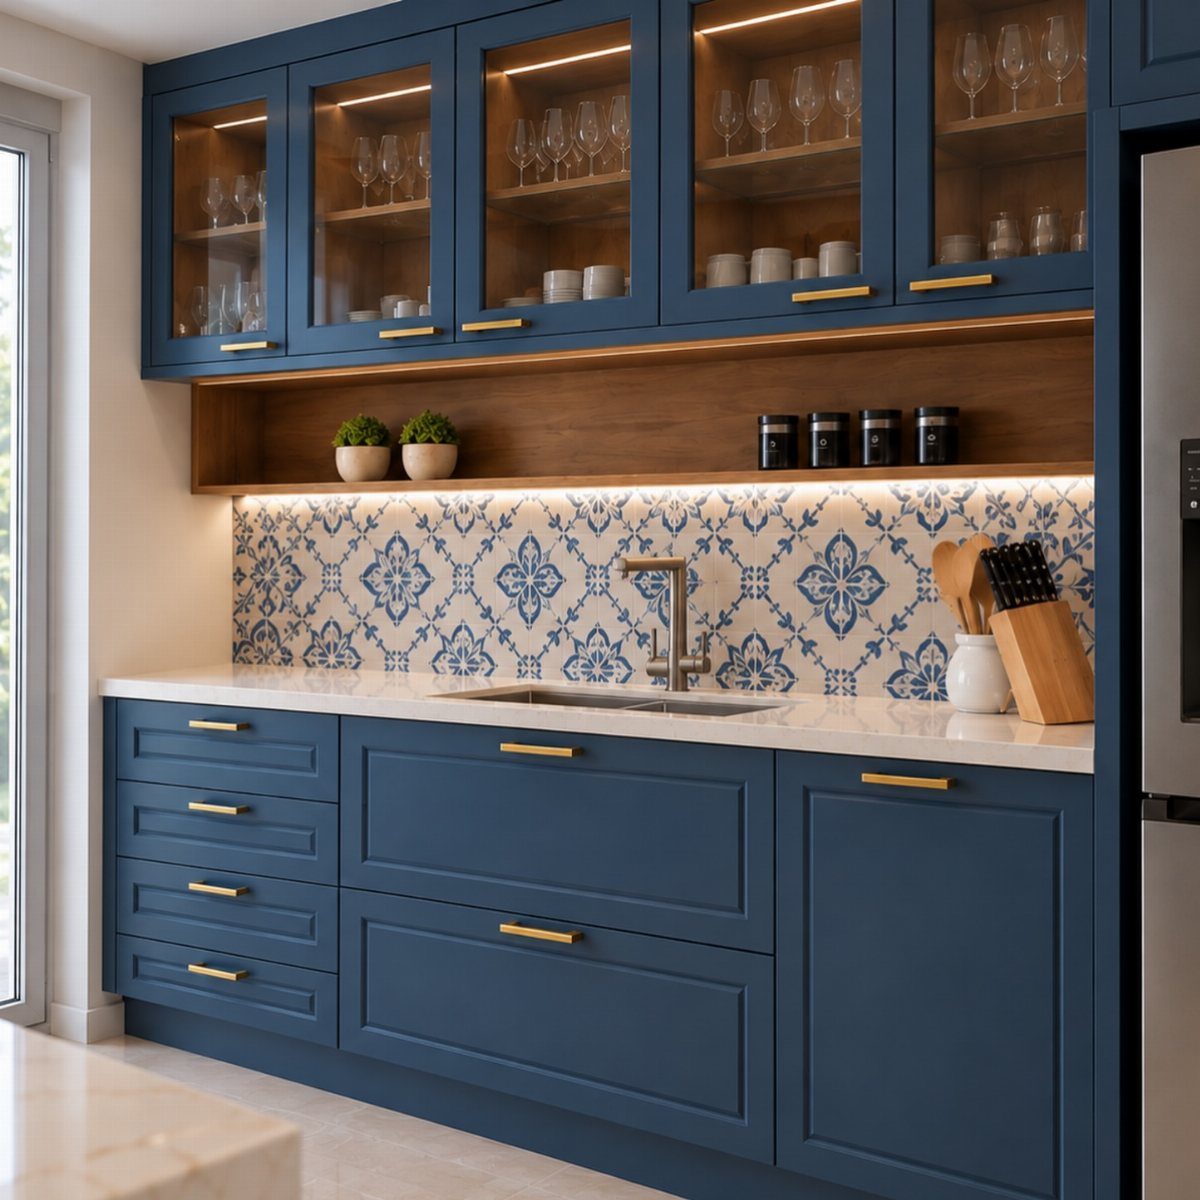
Navy on both the upper and lower cabinets gives an open kitchen a deep backdrop, and the dining area in front of it looks brighter by contrast.
Gold handles warm the blue up, and one wooden open shelf breaks the solid color without adding clutter.
A patterned blue backsplash works here because it stays within the same family as the doors.
I’d keep the counter white and the pattern to one wall. All-over navy with a busy tile in a second color would start to feel loud from across the room.
10. Sliding Door Zones
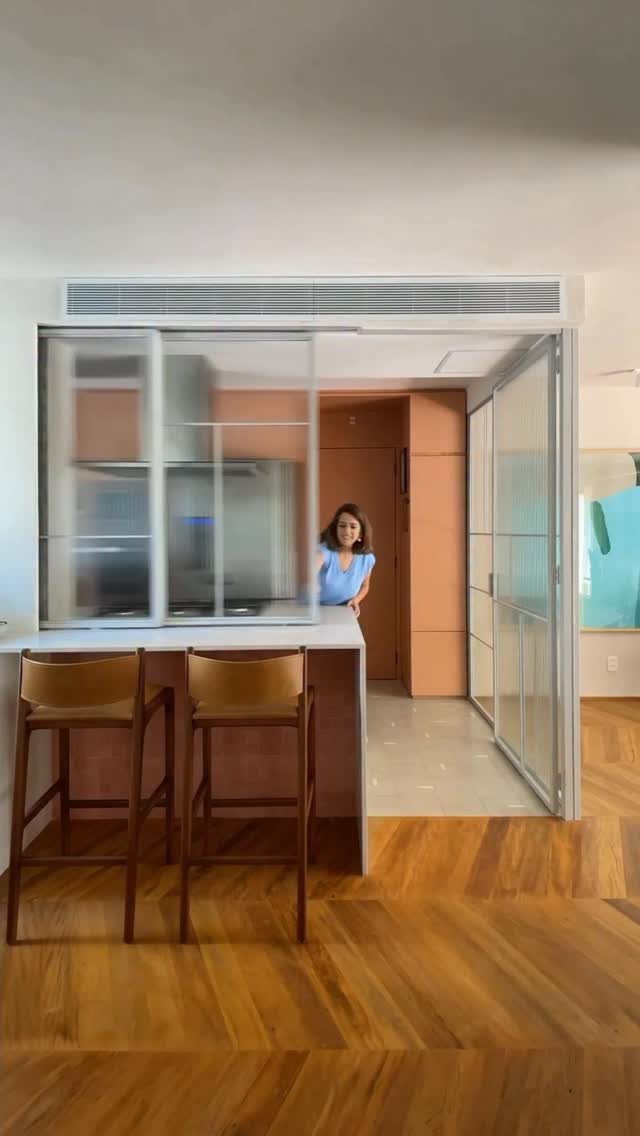
Sliding doors let one open room act as two. Pull them across while someone cooks something smelly or noisy, and the dining side stays calm; slide them back for parties.
Frosted glass is my pick over clear, since it hides a messy counter yet still passes light, which matters in a room without many windows.
Check the floor and ceiling before you commit to a track, because this setup needs a clean, level run. Ceiling-hung hardware keeps the floor clear, so the herringbone boards stay uninterrupted.
11. Wall-to-wall Storage
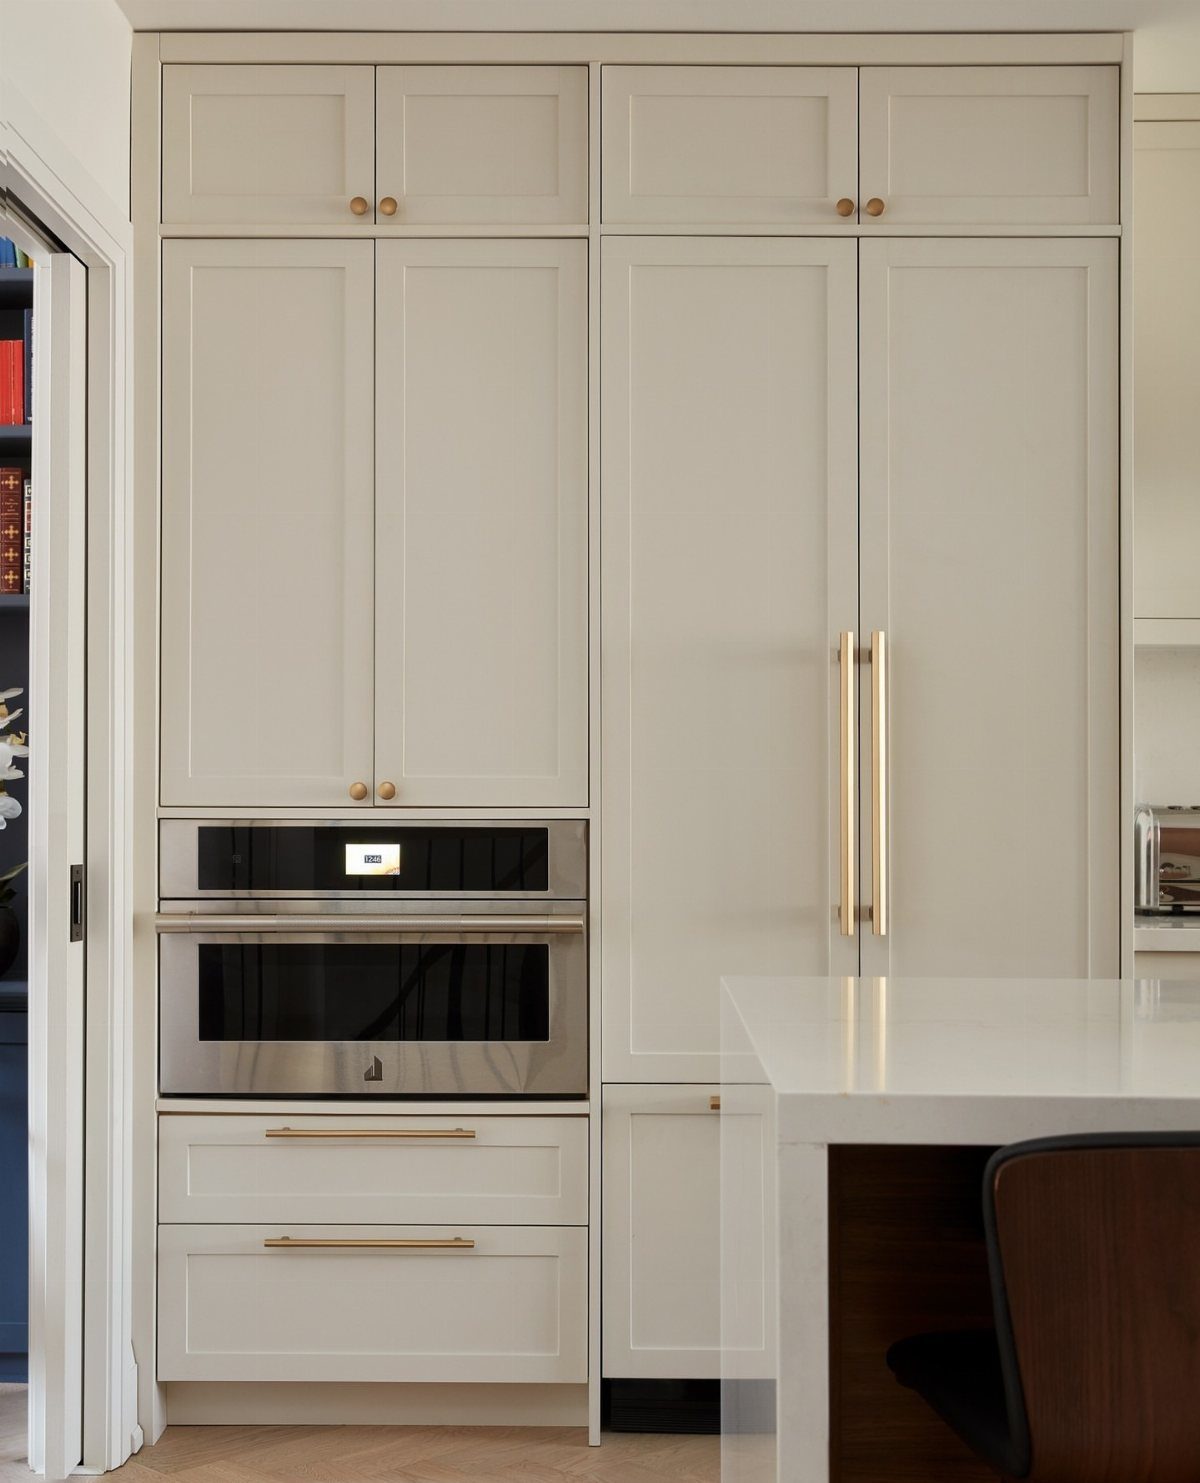
Cabinets that run floor to ceiling leave no dead space above the counter, so dishes, pantry goods and small appliances all disappear behind doors. That is what keeps an open kitchen tidy when the dining table sits in plain view.
Light grey shaker fronts with gold pulls keep a tall wall from feeling heavy.
A built-in oven set into the run frees counter space, and the white counter in front stays clear for prep. Use the top cabinets for items you rarely reach, and keep daily things at arm height.
Benefits of Open-plan Kitchens
Taking out a partition wall makes a small home read larger, because the eye travels the full length of the space instead of stopping at a doorway.
The kitchen borrows daylight from the living room windows, and air circulates through one space instead of sitting in a closed room. Vent the range hood outdoors, since cooking air now reaches the sofa.
Conversation is the third gain. The cook stays part of the gathering instead of working alone behind a wall, so hosting feels less like a chore.
If you own the place and are thinking of removing a wall, have a licensed contractor or structural engineer confirm whether it’s load-bearing first.
Renters can’t touch walls, but keeping sightlines between rooms clear gets you much of the same effect.
The cooktop is a much-used feature of any kitchen, and careful placement is vital. In an open-plan kitchen, The Plan Collection’s home design expert Laurel Vernazza suggests placing it by a wall rather than on an island.
Frequently Asked Questions
What does an open-plan kitchen look like?
An open-plan kitchen has no partition wall between the cooking area and the dining or living space, so prep, seating and meals all share one room.
An island, breakfast bar or peninsula usually marks where the kitchen ends, with the cook on one side and guests on stools on the other.
Running the same flooring through both zones and repeating a few colors makes the room read as one space. The layout still needs careful placement of the cooking zone, work areas and furniture.
How do you style an open-concept kitchen?
Keep the kitchen and dining zones distinct, then link them with a limited color palette, coordinated lighting and a rug.
Repeating small choices also helps: one metal finish for hardware and tap, and an island and stools in the same tone. Continuous flooring across both areas ties the room together, since the eye sees one surface instead of two.