

These ideas run from a few dollars in milk crates to a full floating deck with lumber and footings, and the right one depends on whether you need to take it with you when you leave or sink something permanent into the ground.
Renters skew toward pallet decks and freestanding slat walls; homeowners can build in benches and a floating deck that sits right on the ground.
The proof that this list was built for real budgets is the crate build: milk crates, upright 2-by-2s, and paint from a hardware store, with the whole thing breaking down flat when winter comes.
1. DIY Pallet Deck

A pallet deck starts with wood you do not pay full price for.
Local businesses, online classifieds, and neighbors getting rid of shipping pallets are the usual sources; checking condition matters, since pallets marked for chemical use are not worth the risk.
Clear the ground flat, then lay the pallets in whatever footprint fits your space. Gaps between them give a striped look; tight placement feels more like a solid floor.
Nails or screws hold the arrangement together, and support beams underneath help if the ground is soft or uneven. Sand the tops before anyone walks on them barefoot.
Paint or stain finishes the job, and white paint against green grass reads clean and intentional.
This suits renters who can take the deck with them, or anyone testing whether they use their backyard enough to justify something permanent later.

Wet-Area Ready, No Sealing Required: Pre-finished with cured linseed oil — a natural plant-based wood finish — these tiles install straight from the box — no sealant, no prep, no waiting. Raised base channels water underneath for patios, balconies, pool surrounds, and shower floors

Wet-Area Ready, No Sealing Required: Pre-finished with cured linseed oil — a natural plant-based wood finish — these tiles install straight from the box — no sealant, no prep, no waiting. Raised base channels water underneath for patios, balconies, pool surrounds, and shower floors

Wet-Area Ready, No Sealing Required: Pre-finished with cured linseed oil — a natural plant-based wood finish — these tiles install straight from the box — no sealant, no prep, no waiting. Raised base channels water underneath for patios, balconies, pool surrounds, and shower floors
2. Add Lighting for Ambiance

String lights turn a deck into somewhere you stay after sunset without spending much.
Suspension bars screwed to the railing and adhesive hooks where the lights need a mid-span lift keep string lights in place; heavy-duty zip ties do the fastening.
LED filament bulbs run cooler and last longer than the old incandescent ones, and the warm color temperature matters more than the fixture style.
What changes the feel is height. Lights hung low wrap the seating area like a room; strung higher overhead, they read as open sky with sparkle.
Step lights are a separate move worth adding if you have the wiring access; battery-powered ones work as a test before committing.
I’d start with one circuit of lights and live with it a week before buying more. It is easy to over-light and harder to undo.
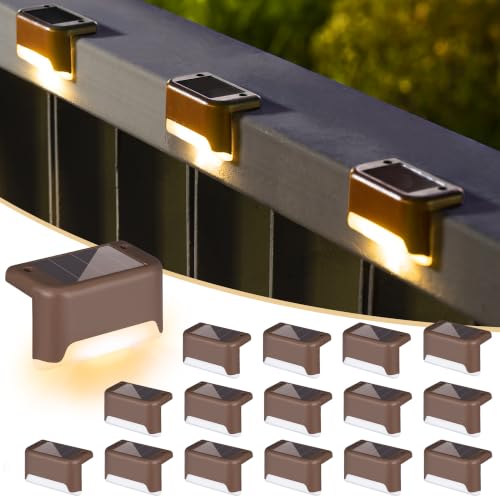
【Warm Light without Dazzling】This deck light features a 𝐁𝐫𝐨𝐰𝐧 𝐬𝐡𝐞𝐥𝐥 and warm white LED, decorate and illuminate your fence, deck, stairs, patio, balcony, yard, or garden. It ensures safer nighttime navigation for the whole family when going downstairs

For Low-Profile Outdoor Accents: 16.4ft Cool White 5000K strip with 150 LEDs fits patios, steps, deck edges, shelves, coves, counters and trim lines

【Works Automatically & Warm White Lighting Decoration】 This LED solar strip lights work automatically without electricity, as the solar panel absorbs the sun's rays and generates power for the light. It contains 90 LEDs, which provide excellent warm white illumination and can turn a dark space into a decorative, lighted space
3. Floating Deck
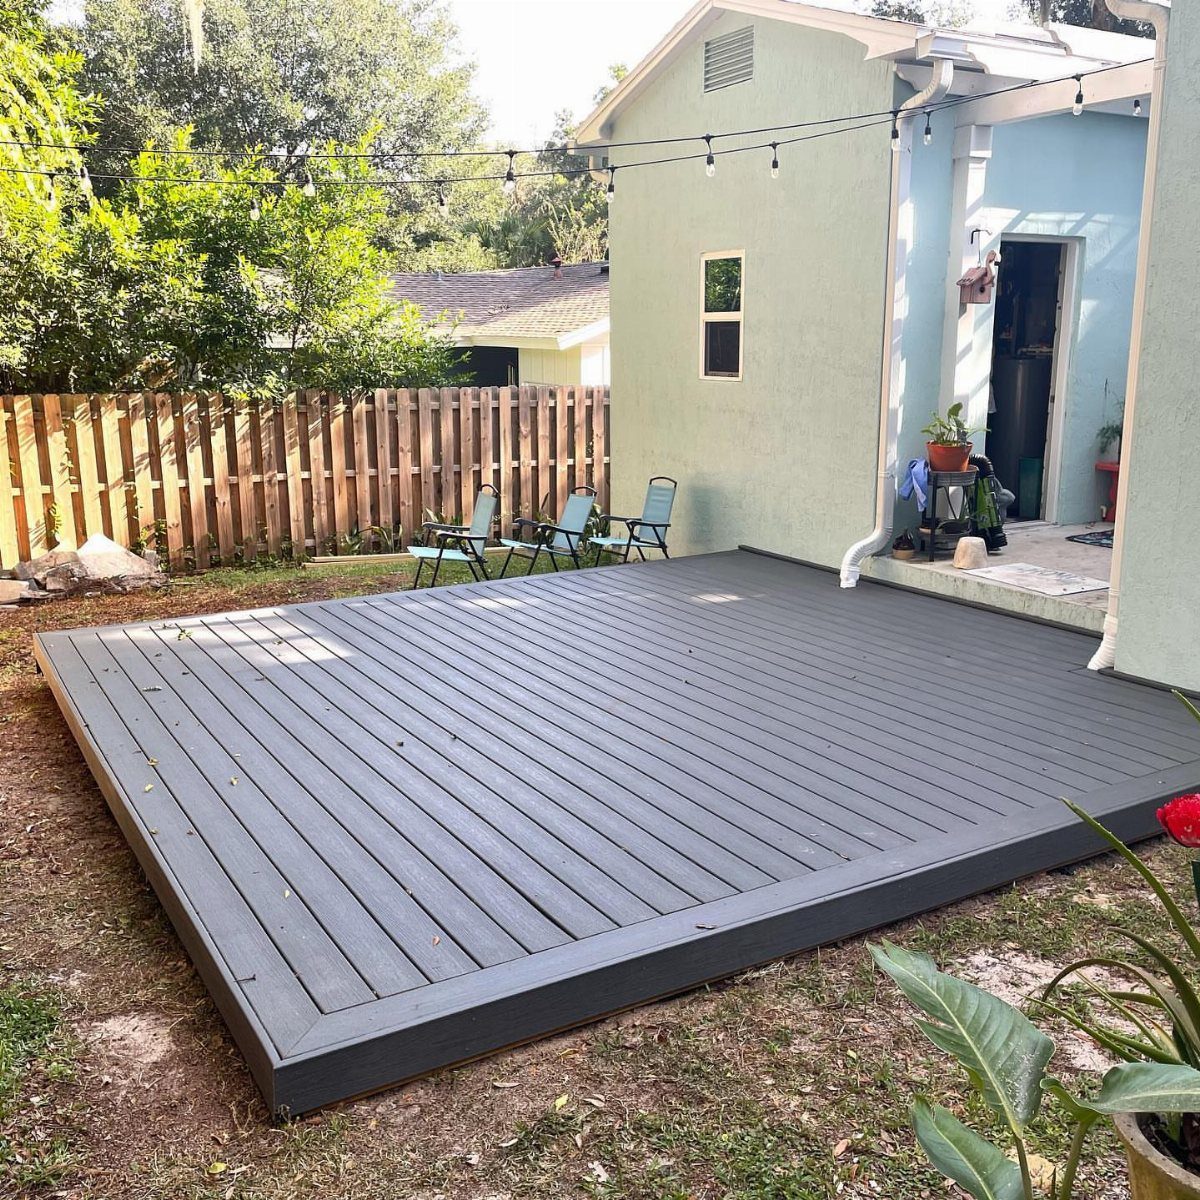
A floating deck sits on posts rather than attaching to your house, which keeps the building permit simpler in most towns and lets you place it where the sun actually falls.
Plan the rectangle with stakes and string, then dig footing holes below your local frost line; that depth varies by region and is worth a phone call to your building department rather than guessing.
Pressure-treated lumber forms the frame, leveled and squared before any decking goes on. The boards on top need gaps left between them, small ones, for expansion when summer humidity hits.
Stain or paint after a season of weathering if you want the color to hold; fresh pressure-treated wood sheds finish applied too early.
A dark gray deck reads modern and hides dirt, but any solid color works if you commit to re-coating every few years. Natural graying is the lower-maintenance path.

Non-Glaring Warm White Light: Not super bright, but it provides enough illumination to see decks, steps, fences, pathways, etc. Whether used as ambient light or accent light, it is an excellent choice. In addition, its simple lines and unobtrusive design can better blend into your garden.
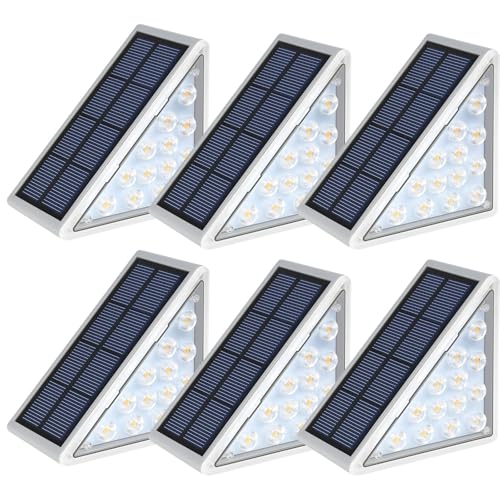
Light up Your Happy Summer Time: Audles step lights create a warm and comfortable atmosphere to enjoy your happy sunmmer time. You can pairing them up with it on each side of the step gives the perfect amount of illumination. Add a warm and pleasant ambiance to your yard and deck. Perfect for outdoor use, creating a pleasant atmosphere for courtyard, stair, garden, tent and lawn.

【Sleek & Functional】The Solar Step Lights for outside makes a simple and practical style,designed for stairs and walkways,providing attractive and bright added lighting to make patio steps safe and charming!
4. Repurpose Old Materials

Salvaged doors and mismatched wood planks give a deck a story no box-store lumber carries. A patchwork deck uses boards of different widths and ages laid in alternating directions, which breaks up the grid feel of standard decking.
Old doors become privacy screens or side walls; a coat of exterior paint unifies pieces that started life in different decades.
The work is in the prep. Reclaimed wood needs checking for rot, nail removal, and sanding enough that splinters do not become the deck’s defining feature.
Salvage yards price by the piece or by weight, and hauling is often on you, so the real cost is time and a truck rather than cash.
This is for the reader who likes irregularity and has patience for fitting pieces together. If you want the deck done in one weekend, new lumber is the honest choice.

Durable and Strong Handi Block: Crafted for maximum strength, this Round Floating Deck Blocks ensures your structures remain secure and resilient, withstanding the test of time and harsh outdoor conditions.

【Premium Materials 】Made from high-quality UV-resistant polypropylene, our adjustable deck support base is designed for remarkable durability and strength for long-term use. It retains its structural stability under most conditions, featuring a ventilation system to prevent water accumulation. This unique, lightweight yet sturdy material addresses the installation difficulties associated with the heavy weight of traditional concrete bases.

Durable and Strong Handi Block: Crafted for maximum strength, this Round Floating Deck Blocks ensures your structures remain secure and resilient, withstanding the test of time and harsh outdoor conditions.
5. Deck with Container Gardens
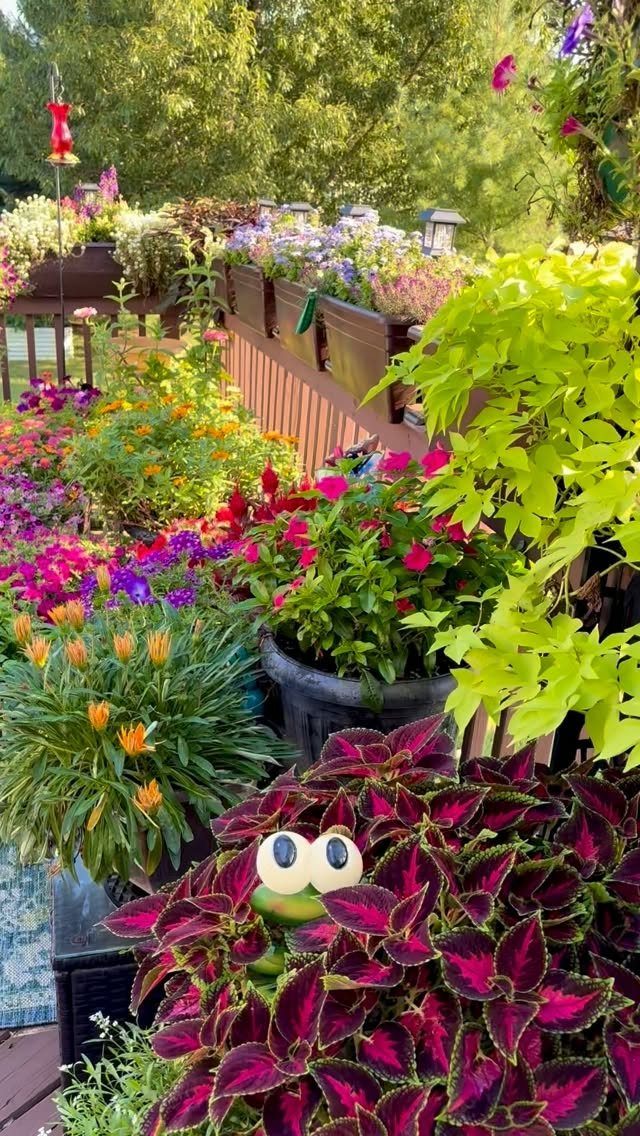
Container gardens let you build color upward without digging into whatever is under the deck. Railing boxes, hanging planters, and pots on the floor all work together; varying height keeps the eye traveling rather than settling on one flat row.
Flowers in pink, purple, and orange against natural wood read lush without needing much square footage.
Choose plants by your light. A deck in full sun wants portulaca, lantana, or dwarf zinnias; shade-tolerant decks get coleus, fuchsia, or impatiens.
Herbs in small pots near the seating area are practical and fragrant. Leave walkways clear; a deck you have to walk around stops being used.
Furniture placement matters as much as the plants. A chair angled to face the railing boxes, not the house, lets you sit inside the garden rather than beside it.

CLAMP-ON DESIGN: Attach this deck hook to horizontal deck railings up to 2 inches thick, providing a stable hanging solution for bird feeders, hummingbird feeders, and outdoor decorations without drilling holes

Double Hook - The outside deck hook hanger is designed with two heavy duty and durable arms, which add stability better. Each clamped shepherd stake comes with 2 poles and the height can be adjusted to 24 or 40 inches by adding or reducing the pipe sections.

【Multi-Use Hook Kit】 Hang Flower Baskets Bird Feeders Chimes Wreaths Lanterns on Any Deck, and very secure and fits almost any Rail Type - Holds up to 15 lbs Weight.
6. Outdoor Rugs

An outdoor rug under a table and chairs does what paint and new furniture cannot: it defines the room in one move.
A black-and-white geometric pattern reads graphic against wood grain and gives a dining area its own floor, which helps when the deck itself is plain pressure-treated lumber going gray.
Polypropylene or recycled plastic rugs handle rain and hose-cleaning; natural fibers mildew and are not worth the savings.
Size the rug so chairs stay on it when pulled out; nothing worse than a chair leg catching the edge every time someone stands up.
A bold pattern hides the dirt that outdoor living generates; light colors show every leaf and footprint by noon.
String lights overhead pair well because the rug grounds the space while the lights lift the eye. Together they make a covered deck feel finished without building anything permanent.

𝗣𝗥𝗘𝗠𝗜𝗨𝗠 𝗟𝗢𝗖𝗔𝗟𝗟𝗬 𝗦𝗢𝗨𝗥𝗖𝗘𝗗 𝗔𝗖𝗔𝗖𝗜𝗔 𝗪𝗢𝗢𝗗: Crafted from carefully selected, locally sourced acacia wood, each tile showcases rich natural grain, warm color variation, and a refined wood appearance. The solid construction offers dependable strength and lasting performance, making these deck tiles a practical and attractive choice for both indoor and outdoor spaces.


Customizable Modular Design Snap-lock system allows tool-free configurations instantly. Use Multi-Tier Stacking for height, Surface Expansion for full garage coverage, or Linear Path layouts for narrow walkways. Adapts to any space.
7. Add Simple Slat Walls

A slat wall turns an open deck into something that feels intentional, even when the neighbors are close.
Black vertical slats spaced to let air through while breaking up sightlines turn a bare edge into a defined room; matching the spacing on a bar counter alongside ties the two pieces together without buying a set.
To build something like this, I’d start with 1-by-1 support beams from the hardware store and wood slats cut to uniform length.
A table saw speeds that up if you have one, but most lumber yards will make the cuts for a few dollars per board.
A nail gun is faster too, though a hammer and nails or a drill work fine; this is forgiving carpentry, not fine furniture.
Stain the slats before you nail them up. I learned that the hard way once, trying to brush between boards already in place.
A slat wall can run one edge, wrap a corner, or back a grill station; the construction stays the same.
This suits renters who can build freestanding panels and take them along, or homeowners who want privacy without a permit-worthy fence project.
What it trades away is total enclosure; gaps mean light and conversation still slip through, which is either the point or a reason to look at solid panels instead.

Auto On/Off & Dusk-to-Dawn Lighting: Our solar fence lights feature a built-in light sensor for automatic operation, turning on at dusk and off at dawn—no manual switching or wiring needed. Enjoy energy-saving solar lights that work hands-free, perfect for outdoor path lighting, deck lighting, and garden lighting.

【WARM LED LIGHT】Warm white deck light, just the right amount of warm glow which is safer for the whole family to go downstairs at night

ADVANTAGE: These solar step lights feature high-performance poly-silicon panels with an 18% photoelectric conversion rate. Fully charge in 4-5 hours under sunlight, providing 10-14 hours of illumination to meet daily lighting needs.
8. Add Greenery with Plant Stand
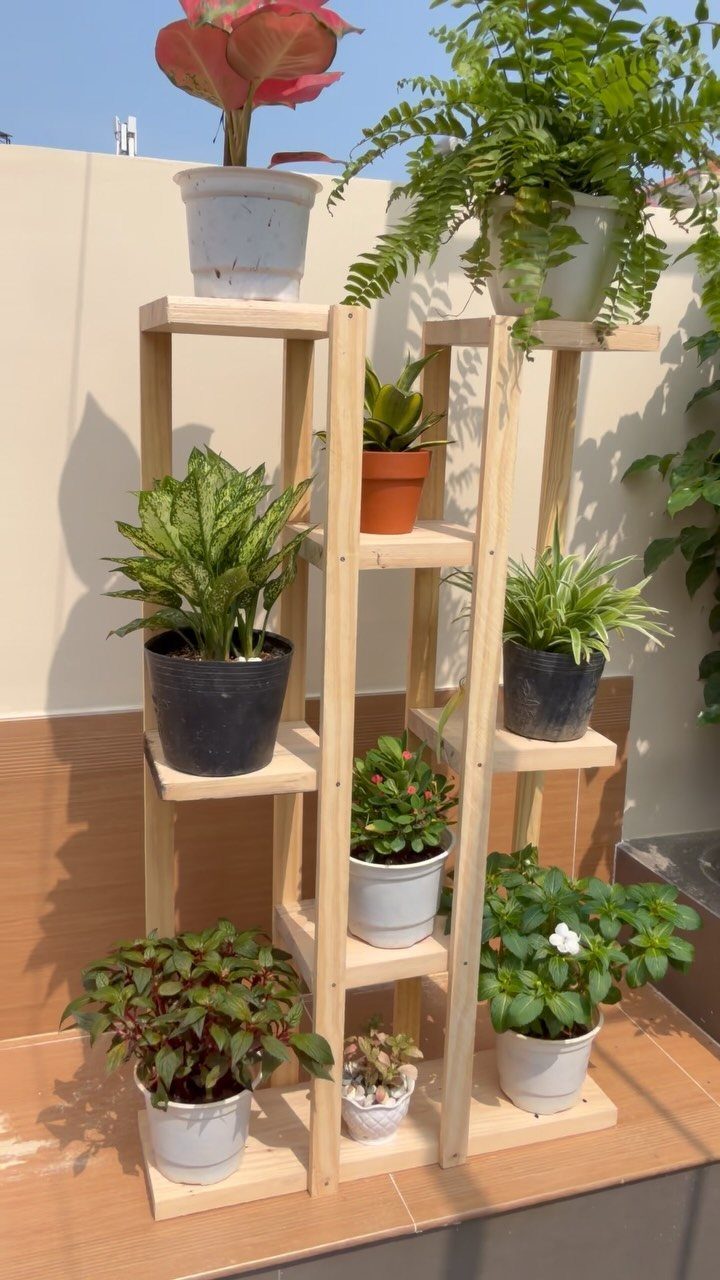
Milk crates and a drill: that is the whole tool list for a plant stand that actually stores something.
A tiered stand in light wood reads cleaner than crate construction, but grouping varied heights against a flat wall is what makes either version work.
For the crate build, I’d secure milk crates to upright 2-by-2s at different heights, paint the crates to match or contrast, and set pots inside.
The cubbies hold soil and drainage trays without the wobble of balancing pots on narrow shelves. A taller, narrower version fits a deck corner where floor space is scarce; the width is up to you.
Herbs for the kitchen want sun and access, so a lower, wider arrangement makes sense. Tropical houseplants summering outside might go higher, where they catch light and stay out of the way of chairs.
Cost stays low because crates run a few dollars at big-box stores or free behind a grocery loading dock. Wood for uprights and exterior paint add little to the total; this is a project built from hardware-store basics.
The whole thing breaks down flat in fall, which matters if your deck doubles as a snow pile zone.

【Safety Lighting & Modern Triangle Design】Light up every step for enhanced safety! NIORSUN solar step lights feature a unique, sturdy triangular design that fits securely in step corners without obstruction. The solar stair lights cast a wide beam to illuminate step edges, reducing tripping hazards after dark. This long-lasting and robust design of outdoor stair lights also adds a modern geometric accent to your front door, deck, patio, garden stairs, porch, yard, and sidewalk.

Three Optional Modes 1.Motion Sensor Light Mode (The lights will go off at night when no motion is detected; when it detecteds motion the step lights stay on at high brightness for 15 seconds and then go off) 2. Permanent On Mode (the lights turn on automatically night and stay on at 10% brightness for 8 hours). 3. Smart Brightness Control Mode (when no motion is detected, the light stays slightly bright all night; when motion is detected, the motion sensor adjusts the light to stay on high for 15 seconds, then back to stay slightly bright)

【Solar Powered & Auto On/Off】Using sunlight as energy, it takes only 4-5 hours to be fully charged on sunny days. With sensor and automated switch, this deck light can turn on automatically at dusk and turn off at dawn.
9. Add Benches

Built-in benches turn the edge of a deck into seating without the squeeze of pulling out chairs.
An L-shaped bench following two sides leaves the center open for movement and the grass beyond visible; a standalone table and chairs would have blocked that view and cost more.
Construction is straightforward lumber: 2-by-4 or 2-by-6 framing, plywood or deck boards for the seat, all painted or stained to match or contrast the decking. I would build the frame first, level it to the deck surface, then skin it.
The backrest is optional; skipping one keeps the bench low enough to sit on from any angle and light enough to build in a morning.
What changes the price is whether you already own a saw and a drill. Lumber for a basic run costs less than prefab outdoor seating; having the hardware store make cuts saves time for a small fee per board.
A bench with storage underneath needs hinged seats and more planning; the open version dries faster after rain and asks less of a Saturday.
This suits the host who needs extra seats for a cookout but lives with fewer most weekends. It trades flexibility for permanence; you cannot rearrange an L-bench for a dance floor.
For small decks the gain is real, since every chair you do not store is space you get back.
You don’t need a bottomless budget to create a stunning backyard deck. With some ingenuity and DIY effort, you can transform your outdoor space into a comfortable and inviting retreat without breaking the bank.


Durable and Strong Handi Block: Crafted for maximum strength, this Round Floating Deck Blocks ensures your structures remain secure and resilient, withstanding the test of time and harsh outdoor conditions.

Versatile Applications: These foundation blocks are ideal for various projects, including decks, sheds, pathways, raised walkways, and other outdoor structures. Designed for easy installation, these pier pads offer solid footing for different building projects, providing robust deck support without the need for digging. This makes them a reliable solution for any home improvement or construction project requiring stable foundation blocks.
10. Umbrella for Shade

Shade determines whether a deck gets used at midday in July or sits empty until evening. Aim for an umbrella large enough to cover a sofa and two chairs with overlap, not one sized to the table alone.
A sturdy umbrella means a pole that does not flex in wind and a base heavy enough to match the span.
Cantilever styles with offset bases cost more and need more ballast; center poles suit most decks and tuck through a table’s center hole. A white canopy reflects heat better than dark colors, though it shows pollen and bird evidence faster.
That is the trade.
Check your deck’s exposure before buying. Morning sun from the east needs different placement than afternoon western glare; pushing a seating area to one side, not centering it, suggests planning for where the sun actually hits.
A tilt mechanism helps track the light through the day without moving the base.
This is the entry-level shade solution: no structure to permit, no posts to sink, no waiting for vines to climb.
The limit is wind; the first gust that lifts an umbrella into the neighbor’s yard is the moment you learn what sturdy actually meant in the description.

【Multi-Use Hook Kit】 Hang Flower Baskets Bird Feeders Chimes Wreaths Lanterns on Any Deck, and very secure - Holds up to 15 lbs Weight.

--Smart telescopic system: freely adjust the golden length of 27"-39", whether it is hanging hanging baskets, bird feeders, or string lights, wind chimes, lanterns, one pole can meet the needs of four-season garden decoration.

【TOP QUALITY BIRD FEEDER HANGER FOR OUTDOOR USE】Crafted from premium-grade iron with powder-coated finish, this robust bird feeder pole ensures long-lasting durability and rust-free performance. Designed for deck railing plant hangers, it securely attaches to railings, fences, or walls, making it ideal for balcony bird feeders or garden setups.
Affordable Materials for Decks
Pressure-treated 2-by-6 decking runs cheaper than cedar or redwood, and the difference shows mainly in how long the color lasts before going gray.
Composite costs more at purchase and less over time, which suits families who treat the deck as background infrastructure rather than a weekend project. No sanding, no splinters, no checking boards for rot each spring.
Pallets sit at the bottom of the price ladder when you find them free, but the hunt takes hours and not every source is safe.
Heat-treated pallets marked HT are the ones to ask for; the MB stamp means chemical treatment and belongs in a fire pit, not under your feet.
DIY Tips for Deck Projects
A tape measure and patience save more money than any tool purchase.
I would measure twice at every stage, especially diagonally across the frame before fastening anything; a rectangle that measures the same corner to corner is square, and fixing that later means rebuilding.
Basic hand tools handle most of these projects. A circular saw, drill, level, and hammer cover pallet decks, slat walls, and bench frames.
A miter box substitutes for a power miter saw on anything short of a full floating deck, and rental runs cheap enough that I just borrow what I can and rent the rest for a day.
Start with a drawing, even a rough one. The plan in your head shifts when you see it on paper, and paper is cheaper than lumber ordered wrong.
Enhancing Outdoor Spaces
A few throw pillows in outdoor fabric soften a bench or crate seating without the cost of new furniture.
Lanterns on a coffee table or hung from a slat wall give light below the string lights, which matters when you want to read or play cards rather than just look up.
A pouf doubles as ottoman and spare seat; it stores flat and costs less than a second chair. Small containers on that table, not just the railing, bring the garden to where you actually sit.
Water features are mentioned in passing but I would skip them on a true budget. The pump, the leveling, the mosquito management: the cost climbs past the calm they deliver.
A bowl of water with a floating candle gives the same ripple for an evening, and empties before bugs find it.
Creating Functional Outdoor Areas
An L-shaped bench leaves the center of a small deck open for a grill cart or a cooler, which matters more than the seating count on paper.
The same footprint with chairs and a table would crowd everyone against the railing.
A rug under the dining area and another defining the seating zone splits one rectangle into two rooms. The eye reads them separately, so a small deck stops feeling like a platform and starts feeling like a plan.
Leave circulation space between zones. A walkway needs real width; less than that and people cut through the conversation rather than around it.
The deck you route around is the deck you stop using by August.