
Rustic tin ceilings have a unique charm that can transport you back in time. If you’ve ever walked into a vintage shop or a cozy farmhouse and felt that warm nostalgia, you understand the allure of these textured, metal masterpieces. The desire to recreate that feeling in your home is exactly why I put this post together. Tin ceilings can be a game-changer in rustic interior design, adding depth and character to any space. Whether you’re updating an existing room or starting from scratch, these ceilings can serve as a stunning focal point.
This post is for anyone who loves vintage home decor, especially those who appreciate the warmth of farmhouse interiors. If you’re someone who dreams of a home filled with charm and personality, you’ll find plenty of inspiration here. From DIY tin ceiling projects to ideas for incorporating antique ceiling tiles, you’ll discover a variety of options to fit your style and budget. Get ready to dive into 13 authentic rustic tin ceilings that will help you create that nostalgic vibe in your home.
By the end of this article, you’ll have a treasure trove of ideas that are not only practical but also full of personality. You can explore colorful painted tin ceilings, unique tile patterns, and creative ways to mix vintage aesthetics with modern touches. Embrace the journey of transforming your space into a delightful haven that reflects your personality and history.
Key Takeaways
– Discover vintage tin tile patterns that can add a unique touch to your ceilings, enhancing the overall aesthetic of your home.
– Learn about colorful painted tin ceilings to brighten your space and showcase personal style through vibrant colors.
– Understand how to create layered textures by combining tin ceilings with wood elements for a warm and inviting atmosphere.
– Get practical tips for DIY tin ceiling projects that allow you to customize your space without breaking the bank.
– Explore ways to maintain and restore antique tin tiles to preserve their charm while ensuring longevity in your home.
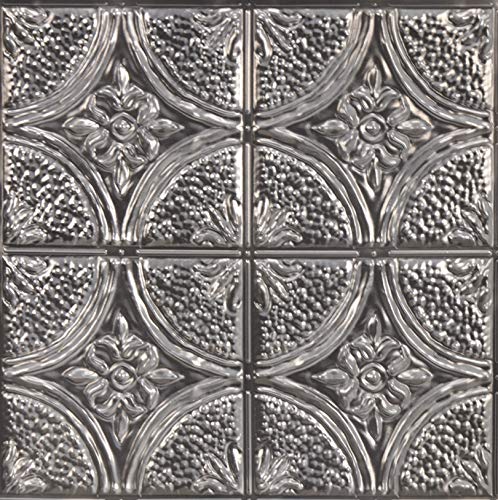
1. Vintage Tin Tile Patterns
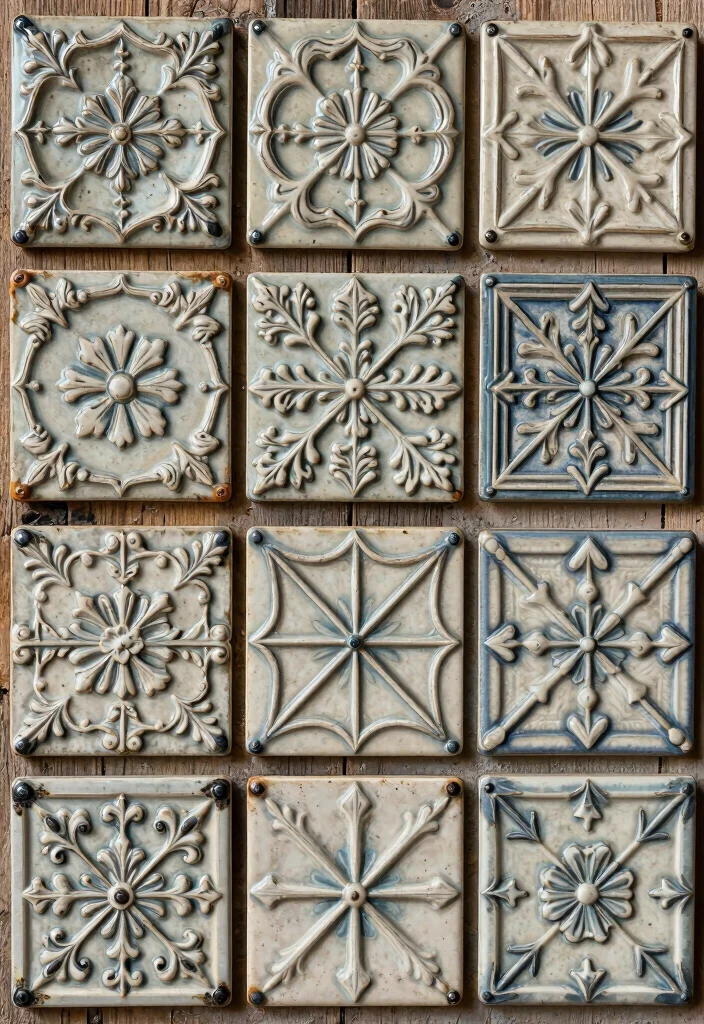
Vintage tin tile patterns offer a captivating way to elevate your ceiling decor. The intricate floral designs and bold geometric shapes transform any ordinary ceiling into a stunning focal point. Each pattern, often hand-pressed, tells a story that resonates with the craftsmanship of earlier times. For instance, a dramatic geometric design can create visual interest in a minimalist space, while delicate florals pair beautifully with antique furnishings. You can also personalize your look by mixing and matching tiles or painting them in colors that reflect your style. Here are some tips for selecting patterns:
– Choose patterns that enhance your space’s overall theme.
– Experiment with contrasting colors to showcase texture.
– Combine different patterns while keeping a cohesive color palette.
By thoughtfully choosing your patterns, you can create a ceiling that is both artistic and reflective of your personal style.
Fun fact: Vintage tin tile patterns have been hand-pressed since the 1890s, making tin ceiling ideas rustic with artisanal charm. These bold geometric or delicate floral designs instantly lift a space, and many homeowners DIY the installation to save time and money—think up to 40% cost savings.

SPACE-SMART COVERAGE MADE SIMPLE: Thoughtfully sized 8 x 8 inch peel and stick tiles come in a coordinating 10-pack that covers approximately 4.44 square feet, making it easy to plan layouts, calculate how many sets you need for your peel and stick tile backsplash, and tackle projects with confidence whether you're refreshing a tiny nook or mapping out a larger feature wall
【5 PIECES 12x12" TIN PANEL】– Please note this is pack of 5pcs 12x12" sample panel, each piece approximately a 12 x 12-inch portion of a panel and will not lay into a standard grid. For larger size, please go to our "pack of 5pcs 24x24"".

Made of lightweight PVC to provide beautiful crisp design and stunning finish
2. Colorful Painted Tin Ceilings
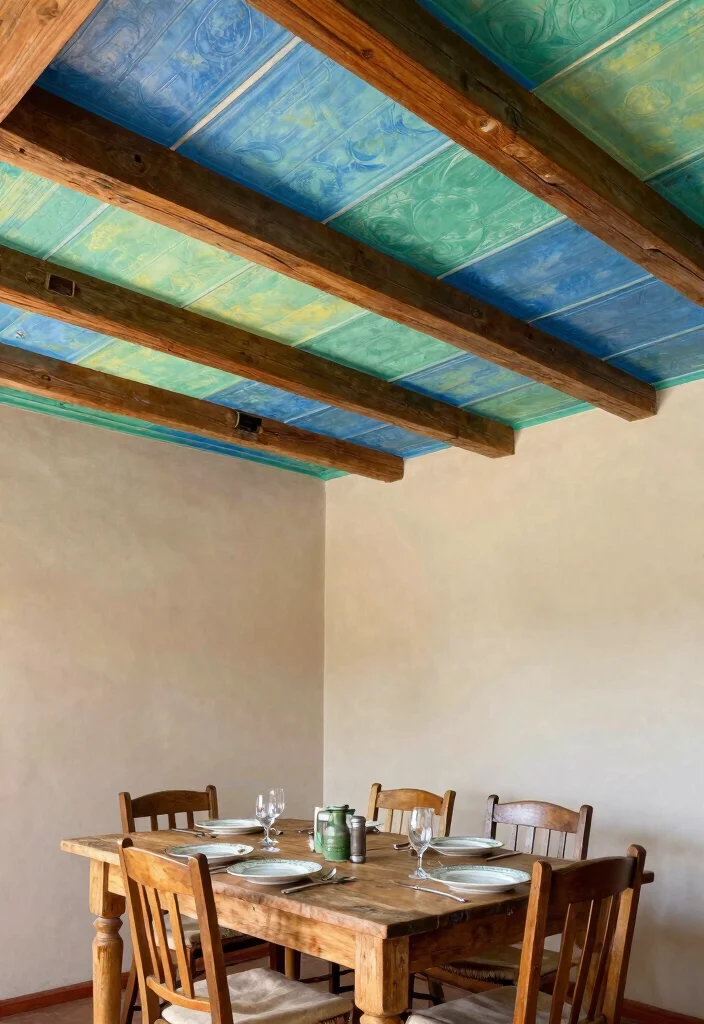
Colorful painted tin ceilings are a delightful way to add personality to your home. By applying vibrant or soft pastel colors to reclaimed tin tiles, you can infuse life into your space. This creative approach allows you to tailor the ceiling to your unique aesthetic. For example, a mint green ceiling can refresh a kitchen, while a deep burgundy can bring warmth to a dining area. Ensure the surfaces are clean and primed before painting for the best results. You might also consider:
– Using a matte finish for a chic, modern look.
– Trying stenciled designs for added creativity.
– Matching ceiling colors with room accents to create harmony.
Choosing the right color can transform the mood of a room, making it an essential aspect of your design journey.

【5 PIECES 12x12" TIN PANEL】– Please note this is pack of 5pcs 12x12" sample panel, each piece approximately a 12 x 12-inch portion of a panel and will not lay into a standard grid. For larger size, please go to our "pack of 5pcs 24x24"".

【Design】The ceiling light features retro exterior design, add a touch of vintage for your space decoration.

Price is per 2'x2' (actual size 23.6"x 23.6") tile.
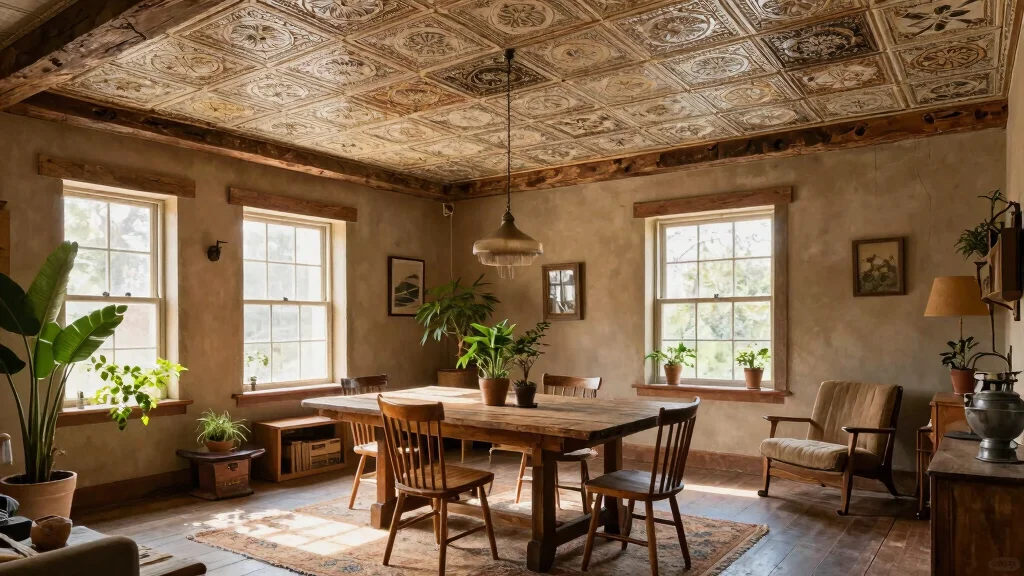
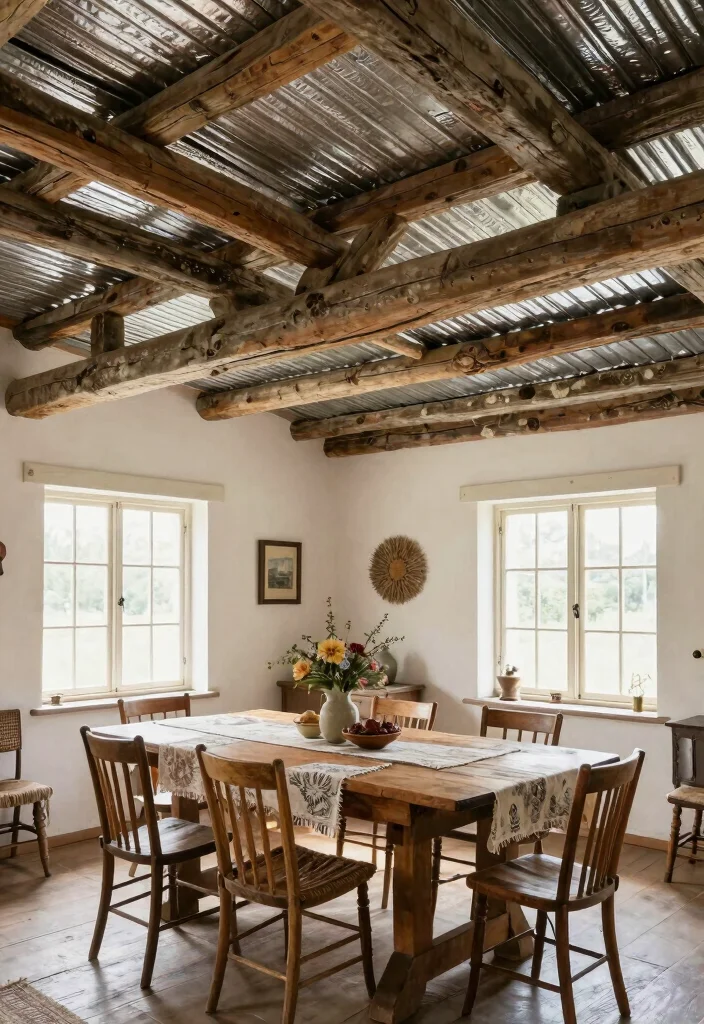
3. Layered Textures with Tin and Wood
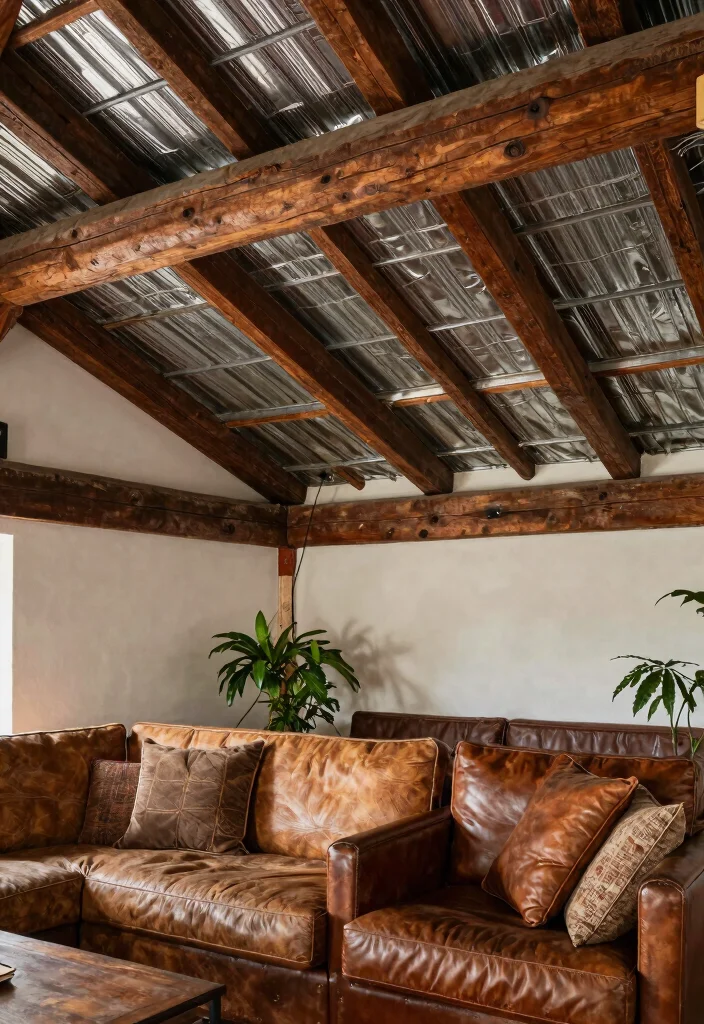
Combining tin ceilings with wooden beams or paneling creates a stunning contrast that enriches your living space. The rustic charm of wood beautifully complements the shiny finish of tin, resulting in a warm and inviting ambiance. Using reclaimed wood beams not only enhances the rustic appearance but also promotes sustainability. You can achieve various looks by:
– Pairing lightly stained wood with vintage tin for a soft atmosphere.
– Using dark, rustic wood for a cozy, dramatic effect.
– Highlighting textures by leaving some wood exposed or painted differently.
By exploring these layered textures, you can craft an inviting space that resonates with vintage charm.
FOUR TILES PER PACK: RoomMates StickTILES include four individual 10.5 inch x 10.5 inch self-adhesive tiles per pack.

Dimensions - 4 faux textured tin tiles per pack - 10.5 inches x 10.5 inches
How To Install Tin Ceilings
Tools You’ll Need:
– Measuring tape
– Level
– Tin snips
– Hammer
– Adhesive or nails
– Safety goggles
– Ladder
– Caulking gun (if needed)
Step 1: Measure & Prep
Before you start, take accurate measurements of the ceiling space where you’ll install the tin tiles. Use a measuring tape to determine the length and width of the area. Make sure to note any irregularities, such as light fixtures or vents that might affect the installation. Once you have your measurements, plan your layout for how the tiles will fit. You may want to sketch it out to visualize the final look. ✔ Check for any damage on the existing ceiling and repair it beforehand.
Step 2: Gather & Organize Materials
Collect all the materials you’ll need for the project. This includes the tin ceiling tiles, adhesive or nails, and any finishing materials. Organize them in your workspace for easy access. It’s a smart idea to lay out the tiles in the order you’ll install them. This prevents mixing up patterns, especially if you have various designs or colors. ✔ Double-check that you have enough tiles before starting.
Step 3: Prepare the Ceiling Surface
Make sure the ceiling surface is clean and smooth. Remove any dust, dirt, or grease that could interfere with adhesion. If you’re working with a painted ceiling, you might need to sand it slightly to ensure a strong bond with the tiles. Use a level to check for any uneven spots. If necessary, use a thin layer of drywall or plywood to create a flat surface. ✔ Ensure safety goggles are worn during this step.
Step 4: Apply Adhesive & Place Tiles
Begin at the center of your ceiling and work your way outwards. Apply the adhesive evenly on the back of the first tile, or apply it directly to the ceiling, depending on the method you choose. Carefully press the tile against the ceiling, ensuring it’s level. Adjust as necessary before the adhesive sets. Continue placing tiles, using spacers if needed to maintain consistent gaps. ✔ Use a level frequently to keep everything aligned.
Step 5: Secure Tiles
Depending on the type of adhesive you used, you may want to reinforce the tiles with nails. Hammer them in at the corners and along the edges for added security. Be gentle to avoid bending or damaging the tiles. If using adhesive, allow it to cure according to the manufacturer’s instructions before proceeding. ✔ Keep your workspace clean as you go to prevent slips and falls.
Step 6: Finish & Seal
Once all the tiles are installed, check for any gaps or exposed edges. Use caulk to fill in any cracks for a polished look. If you’ve selected painted tiles, consider applying a clear sealant to protect against wear. Finally, step back and admire your new ceiling! Make adjustments as necessary, like adding trim or light fixtures that accentuate the tin’s beauty. ✔ Take photos to showcase your hard work!
⏱ Time: ~4-6 hours | 💡 Tip: Having a helper can make the lifting and positioning of the tiles much easier, ensuring a smoother installation process. Working together also speeds up the project!

【Effortless DIY Installation】Achieve professional results with our peel and stick ceiling tiles—no extra glue, tools, or skills needed. These foam ceiling tiles are lightweight and easy to cut, making DIY glue up ceiling tiles installation simple on any clean, flat surface
KIT: 5 Pack of Tin Panels.
4. Vintage Lighting to Enhance Tin Ceilings
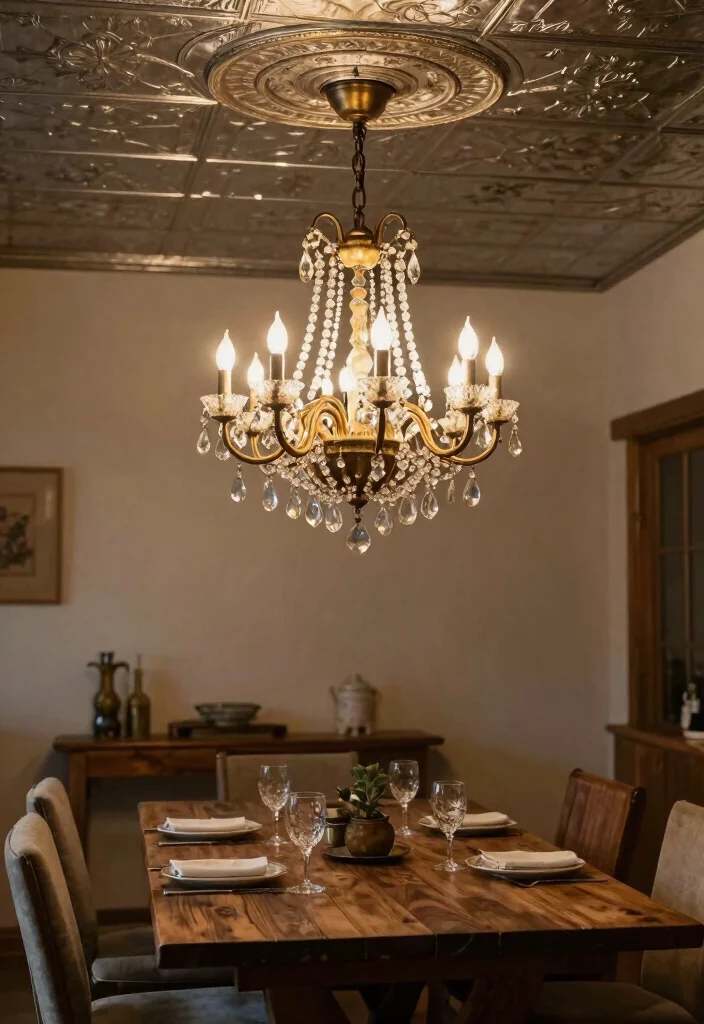
Lighting is essential for showcasing the beauty of tin ceilings. Vintage fixtures like chandeliers or pendant lights draw the eye upward and illuminate the intricate tile details. Opt for warm-hued bulbs to soften the metallic sheen and create an inviting glow. Look for fixtures that align with the vintage theme, such as wrought iron or antique brass. Here are some ways to enhance your ceilings with lighting:
– Use oversized fixtures to make a striking statement.
– Hang lights at different heights for visual interest.
– Incorporate dimmer switches to adjust brightness for various occasions.
Well-placed lighting can transform your tin ceiling into a stunning centerpiece that enhances the overall atmosphere of your home.

ANTIQUE FURNITURE RESTORATION – Minwax Antique Furniture Refinisher is a low viscosity, amber-colored blend of solvents and wood conditioners that will help you restore and refinish antique furniture.

Each Tile is 50cm x50cm. Each package of 8 covers 21.6 SQFT

Authentic Aging Without Sanding: Amy Howard’s Light Antique Wax adds years of authentic aging to your vintage furniture and décor, delivering a beautiful finish without the hassle of sanding or distressing. Perfect for DIY furniture restorations, this wax enhances the natural wood grain while giving your piece a vintage or rustic look. Its rich, honey-hued tone is ideal for creating a timeless, aged appearance on antiques and newer pieces alike.
5. DIY Tin Ceiling Projects
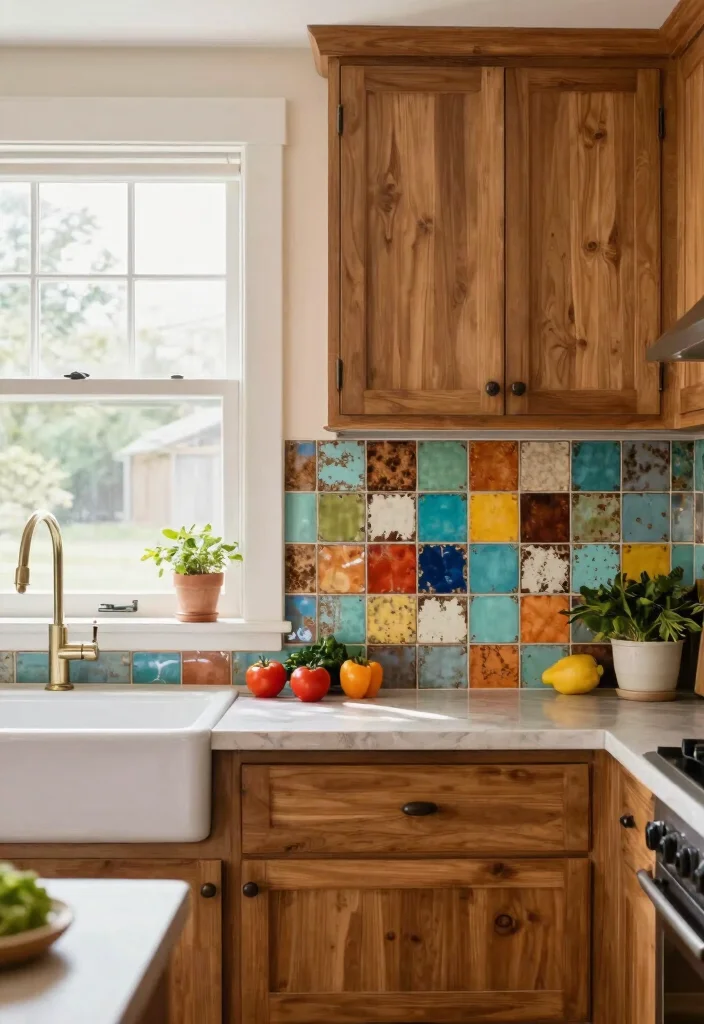
If you enjoy crafting, DIY tin ceiling projects can personalize your space while embracing rustic charm. From creating feature walls to accentuating small nooks, there are countless ways to integrate tin into your home. One popular idea is using tin tiles as a kitchen backsplash—it’s both visually appealing and easy to clean. You can also create an accent wall that serves as a stunning backdrop for your decor. Here are some DIY ideas to inspire you:
– Trim out a full wall with reclaimed tin tiles for a bold statement.
– Craft picture frames using tin tiles for a unique gallery wall.
– Use painted tiles for a vibrant twist on classic designs.
DIY projects not only add a personal touch but also offer a chance to unleash your creativity.

Pack Quantity: Each package contains 12 tiles, each measuring 24"x24", and covers a total area of 48 square feet.

INSTALLATION: Easily lay into a standard 15/16" T-bar drop ceiling grid system or glued over any flat substrates

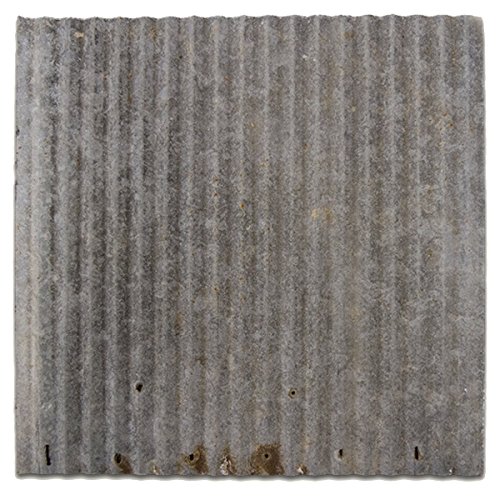
Sample includes one piece that is approximately a 12 x 12-inch portion of a panel and will not lay into a standard grid
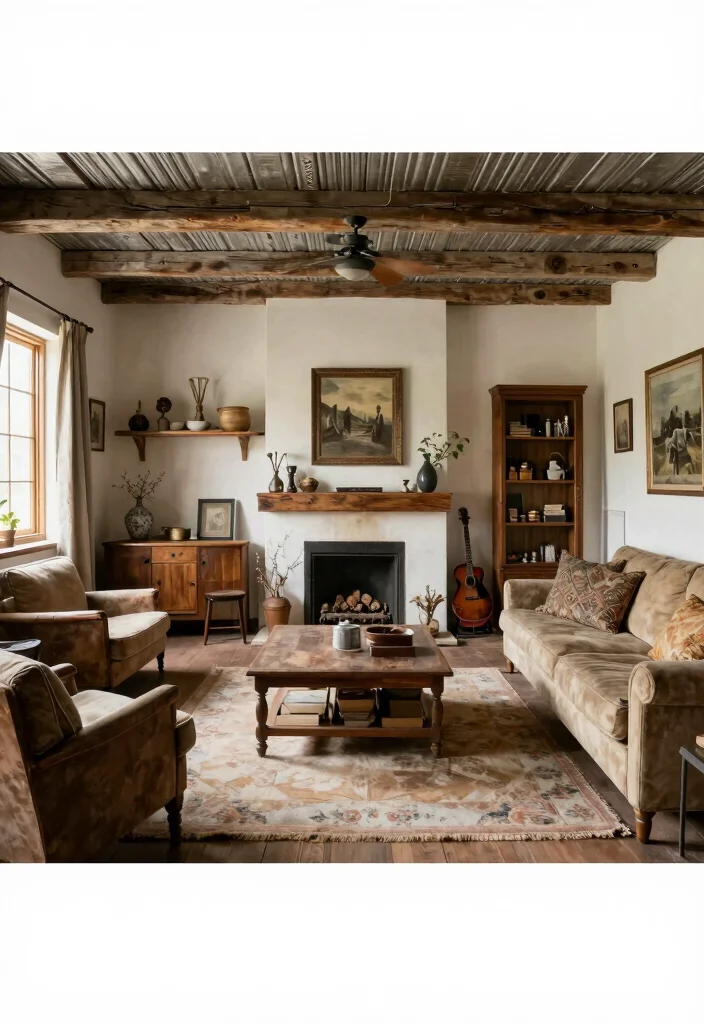
6. Rustic Farmhouse Style Ceilings
Embracing the rustic farmhouse style is a timeless choice for vintage enthusiasts, and tin ceilings fit seamlessly into this aesthetic. The blend of natural materials and handcrafted features creates a warm and inviting environment. Rustic farmhouse ceilings typically incorporate exposed beams, wooden accents, and reclaimed tin tiles. These elements work together to foster a cozy atmosphere that feels both stylish and lived-in. Consider adding vintage decor items to enhance the look. Here are some tips for achieving a farmhouse-style ceiling:
– Mix tin tiles with exposed wood for depth.
– Choose earthy colors to mimic natural tones.
– Incorporate vintage light fixtures that enhance the rustic vibe.
By merging these elements, you can create a ceiling that captures the essence of a traditional farmhouse while reflecting your unique style.

Package of 6 Vintage Inspired Rusty Embossed Leaves and Berries Antique Tin Ceiling Tiles
Price is per 2'x2' (actual size 23.6"x 23.6") tile.

Made from high quality Polystyrene foam
7. Mixing Modern and Vintage
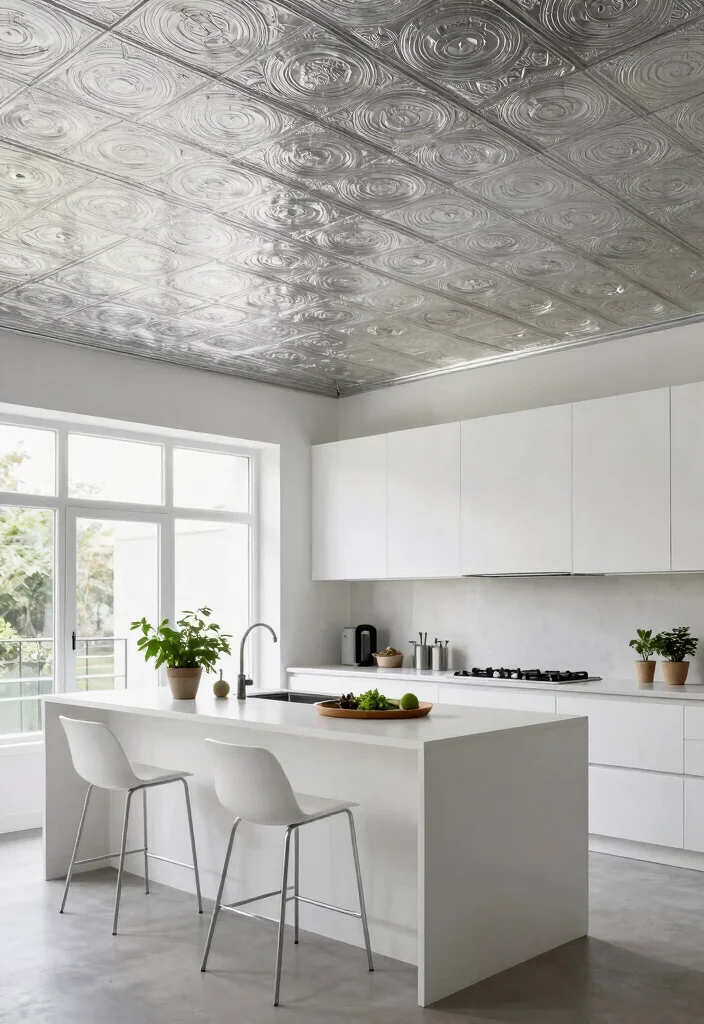
Blending modern design elements with vintage tin ceilings creates a striking contrast that adds depth to your space. Pairing sleek, minimalist furniture with classic tin tiles can achieve an eclectic vibe that feels fresh and inviting. For example, modern pieces in neutral colors can balance the textured patterns of tin beautifully. This style choice allows you to honor the past while celebrating contemporary design. Here are some ideas for merging these styles:
– Use neutral tones in modern furniture to let the tin ceiling shine.
– Incorporate metallic accents that echo the tin’s luster.
– Select modern light fixtures that complement the vintage theme.
This fusion can result in a dynamic living space that keeps guests intrigued and engaged.
![American Tin Ceilings [5-Pack Kit] Nail-Up Metal Tiles in Pattern #2 Nail-Up and Color Unfinished. 24" x 24" [20 sq ft] Genuine Tin | Made in The USA | Model: n-p02-raw](https://m.media-amazon.com/images/I/51WU6TvM1vL._SL500_.jpg)
🏠 SUSTAINABLE AND HANDCRAFTED IN THE USA: Each package includes 5 large, beautiful nail-up metal ceiling tiles made from 25% recycled T1-grade tin-plated steel
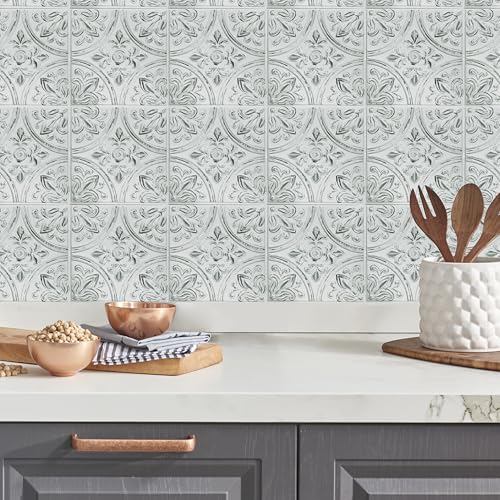
Silver tin inspired peel and stick backsplash tile

⚠️ 𝐀𝐭𝐭𝐞𝐧𝐭𝐢𝐨𝐧: For latex walls or repainted, 3M spray adhesive is recommended as assist ❗❗
8. Incorporating Tin into Smaller Spaces
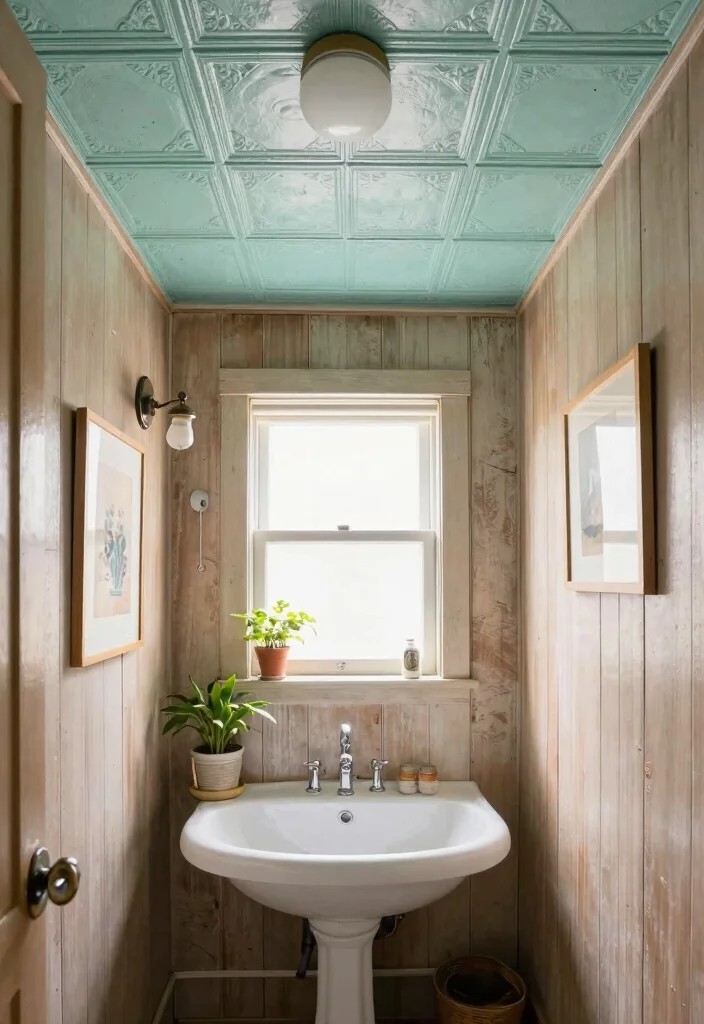
You don’t need a large room to enjoy the allure of a tin ceiling. Smaller spaces can greatly benefit from this design element, making them feel unique and inviting. An entryway, bathroom, or cozy nook can be transformed with tin tiles, adding a touch of shine that leaves a lasting impression. Here are some ideas for incorporating tin in smaller spaces:
– Use tin tiles at half-wall height to create a striking border.
– Apply tin only to the ceiling of a small bathroom for style without overwhelming.
– Highlight the tin with mirrors or fixtures that reflect its beauty.
Even in compact areas, thoughtful design can create a stunning atmosphere that feels warm and welcoming.

【1 PIECE 12x12" TIN PANEL】– Please note this is a sample panel,approximately a 12 x 12-inch portion of a panel and will not lay into a standard grid. For larger size, please go to our "pack of 5pcs 24x24"".

🏠DETAILS: Size 17.5 x276 Inch , total 33.5 sq.ft(44.5cmX7m), Self adhesive (no extra glue needed). Made of vinyl. Ceiling tile wallpaper stick and peel, ⭕Smooth surface Faux 3D non-embossed, Waterproof, Renter Friendly.
9. Accent Walls with Tin Tiles

Creating accent walls with tin tiles is a trendy way to highlight specific areas in your home. An accent wall draws attention and adds rustic elegance, making it ideal for living rooms, dining areas, or bedrooms. Choose tiles with bold designs or vibrant hues that complement your decor. For a subtler approach, select aged tin with a patina finish. Here are some tips for crafting a stunning accent wall:
– Identify the wall that will benefit most, such as behind a sofa.
– Balance the surrounding decor with complementary colors and textures.
– Consider lighting options that enhance the tin’s beauty.
This accent wall can be a conversation starter, inviting guests to appreciate the care you’ve taken in your design.
❝ Accent walls with tin tiles turn a room from flat to memorable in hours. Pick bold designs or a patina finish, then balance with neutral furniture for rustic charm that lasts. ❞

HEAVY DUTY ANTI-WOBBLE STRUCTURE: Crafted from premium reinforced zinc alloy, this ceiling fan bracket prevents blade drooping and snapping, delivers steady wobble-free...
10. Reflecting Your Personality with Tin

Using tin ceilings gives you a fantastic opportunity to express your personal style. From your paint choices to the layering of materials, you can infuse your unique personality into every detail. Think about your favorite colors, patterns, and decor styles when planning your tin ceiling project. For a bohemian vibe, colorful tiles mixed with braided textiles can create a charming look. Conversely, a sleek, modern style can be achieved with monochromatic colors and minimalist decor. Here are suggestions to make your tin ceiling truly yours:
– Embrace your color palette with painted tiles.
– Mix various tile patterns that resonate with your aesthetic.
– Incorporate personal decor items that reflect your interests.
This approach ensures your space feels authentic and welcoming.
11. Restoring Antique Tin Tiles
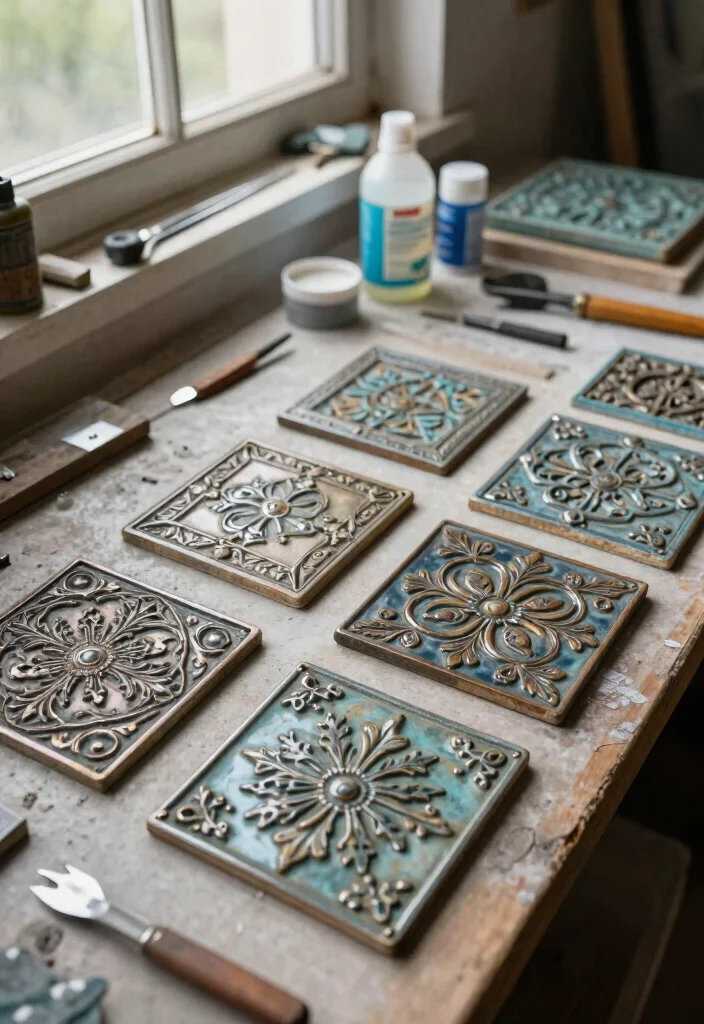
Restoring antique tin tiles can be a rewarding project that enhances your home’s beauty and value. These tiles often carry rich histories and unique charm, making the effort worthwhile. Restoration may involve gentle cleaning and minor repairs to keep their integrity while showcasing their beauty. Here are some tips for restoration:
– Carefully clean old paint or grime using gentle methods.
– Inspect for damage and make necessary repairs to maintain quality.
– Once restored, display them as ceiling tiles or unique wall art.
Properly restored antique tiles not only preserve history but also become stunning focal points in your home.
12. How to Install Tin Ceilings

Installing tin ceilings can be a fulfilling DIY project that adds significant value to your home. With the right materials and planning, you can create a stunning ceiling that revitalizes your space. Start by gathering your materials, including tin tiles, adhesive, and a measuring tape. Before installation, measure your ceiling and plan your tile layout for a perfect fit. Ensure the surface is clean and smooth to promote optimal adhesion. Here’s a brief overview of the installation process:
– Prepare the ceiling by cleaning and patching imperfections.
– Lay out tiles on the floor to visualize the arrangement.
– Start attaching tiles from the center outward, using adhesive or nails.
Following these steps will help you achieve a professional-looking installation that enhances your home’s aesthetic.
13. Maintaining Your Tin Ceiling

Maintaining your tin ceiling’s beauty is simple and requires minimal effort compared to other materials. Regular cleaning helps preserve its shine and prevents tarnishing. Use a soft cloth or sponge with mild detergent to clean the surface gently, avoiding harsh abrasives. It’s also wise to check for rust or wear and address any issues promptly. Here are some maintenance tips:
– Schedule regular cleanings to keep the surface fresh.
– Check for rust and treat immediately with rust remover if needed.
– Avoid placing heavy items against the ceiling that could damage tiles.
By following these maintenance tips, you can ensure your tin ceiling remains a stunning feature for years to come.
“Fun fact: regular cleanings every few months keep tin ceilings gleaming for years—just 5 minutes once a season can prevent tarnish and rust. Pro tip: for tin ceiling ideas rustic in your space, use a soft cloth and mild detergent; skip harsh abrasives to protect the rustic tin.”
Conclusion
The timeless appeal of rustic tin ceilings offers an incredible way to enhance any vintage-inspired space.
From bold patterns to stunning DIY projects, there are countless ways to incorporate these charming elements into your home decor.
Explore different techniques and styles to find what resonates with your personality, making your space as unique and inviting as you are.
Frequently Asked Questions
What are some popular tin ceiling ideas rustic for a vintage farmhouse look?
If you’re after tin ceiling ideas rustic for a vintage farmhouse vibe, start with embossed antique tiles in warm tones, a light patina, and subtle contrast with wood trim. Decide between reclaimed tin ceiling tiles or new reproductions, then map a grid pattern that suits your room size. Choose finishes like aged bronze, pewter, or a soft silver to complement farmhouse style ceilings and vintage home decor goals. Finally, plan lighting to highlight the texture without washing it out. For a hands-on tester, try a small patch before tackling the entire room.
Tip: keep the palette cohesive with warm neutrals and natural materials for a timeless look.
How can I start a DIY tin ceiling project—from planning to installation?
Great question for DIY tin ceiling projects. Start by inspecting the ceiling structure and removing any old tiles if needed. Measure precisely, order enough antique ceiling tiles or reproductions, and gather tools: metal snips, heavy-duty adhesive or mechanical fasteners, furring strips, a level, and a caulk gun. Prep with PPE and ensure good ventilation. Install furring strips to create a flat base, then lay out tiles in your chosen pattern and cut around vents or beams. Attach with adhesive and nails, seal gaps with paintable caulk, and finish with a clear coat or patina if desired. Test-fit a small section first to avoid costly mistakes. This approach keeps your project practical and aligned with rustic interior design and DIY tin ceiling projects ambitions.
Where can I source authentic antique ceiling tiles, and what’s a realistic budget for a rustic tin ceiling?
Sourcing authentic antique ceiling tiles can amp up any room. Check salvage yards, architectural antique shops, and reputable online marketplaces for antique ceiling tiles in good patina. Always inspect for dents, corrosion, or warranty issues. Ask for full tile dimensions and condition notes, and compare quotes from several sellers to gauge market value. For a practical budget, expect tile prices to vary—reclaimed tiles can range from a few dollars to around $20 per tile depending on size, rarity, and shipping. Add materials for installation, finish coatings, and labor if you’re not DIYing. A typical farmhouse style ceilings upgrade might run a few hundred to a few thousand dollars, depending on room size and the amount of tin used. Pro tip: request samples or buy small batches to test color and patina before committing, and check returns.
What maintenance do tin ceilings require to keep that rustic look over time?
Tin ceilings are surprisingly low-maintenance, but a little care goes a long way. Regularly dust with a microfiber cloth or a soft brush, then clean with a mild detergent diluted in water and a soft sponge. Avoid abrasive pads and harsh chemicals that can scratch or strip patina. If you notice rust or dull spots, treat with a rust-inhibiting primer and a compatible topcoat in a color that matches your finish. Check for loose tiles and reseal joints every few years to keep moisture out. A light coat of wax or a clear protective sealant can help preserve the vintage home decor look without concealing texture. Stay mindful of humidity in kitchens and bathrooms to prevent staining or corrosion. With proper care, your rustic tin ceiling can stay charming for decades.
How can I style a room around rustic tin ceilings to create cohesive vintage home decor?
Let the ceiling set the tone and build the room around it. Use warm, earthy colors and natural textures to complement the tin ceiling ideas rustic vibe. Pair reclaimed wood beams, stone or brick accents, and vintage lighting to highlight the texture. Choose furniture with antique or distressed finishes and layer textiles—linen, burlap, and soft plaids—to enhance the farmhouse feel. Keep window treatments light to avoid overpowering the ceiling, and use mirrors or metallic accents to reflect light. Finally, maintain a balanced scale so the ceiling remains the focal point while your vintage home decor remains harmonious. If you’re collaborating on a DIY tin ceiling projects, document your steps and share them as part of your journey.
Related Topics
rustic tin ceilings
vintage home decor
farmhouse style
antique ceiling tiles
DIY tin ceiling
rustic interior design
home renovation
reclaimed materials
easy DIY projects
country chic
vintage aesthetics
home improvement